Pumpkin Snacks and Crafts

photo-19.jpg

It's finally starting to feel like fall here in Athens. The leaves are changing colors, the nights are cooling off, and of course pumpkins are everywhere. It's still a little too early to carve pumpkins for Halloween, so the kids and I decided to get in the fall spirit by incorporating other forms of pumpkin in our lives!

photo (19)

IMG_8693

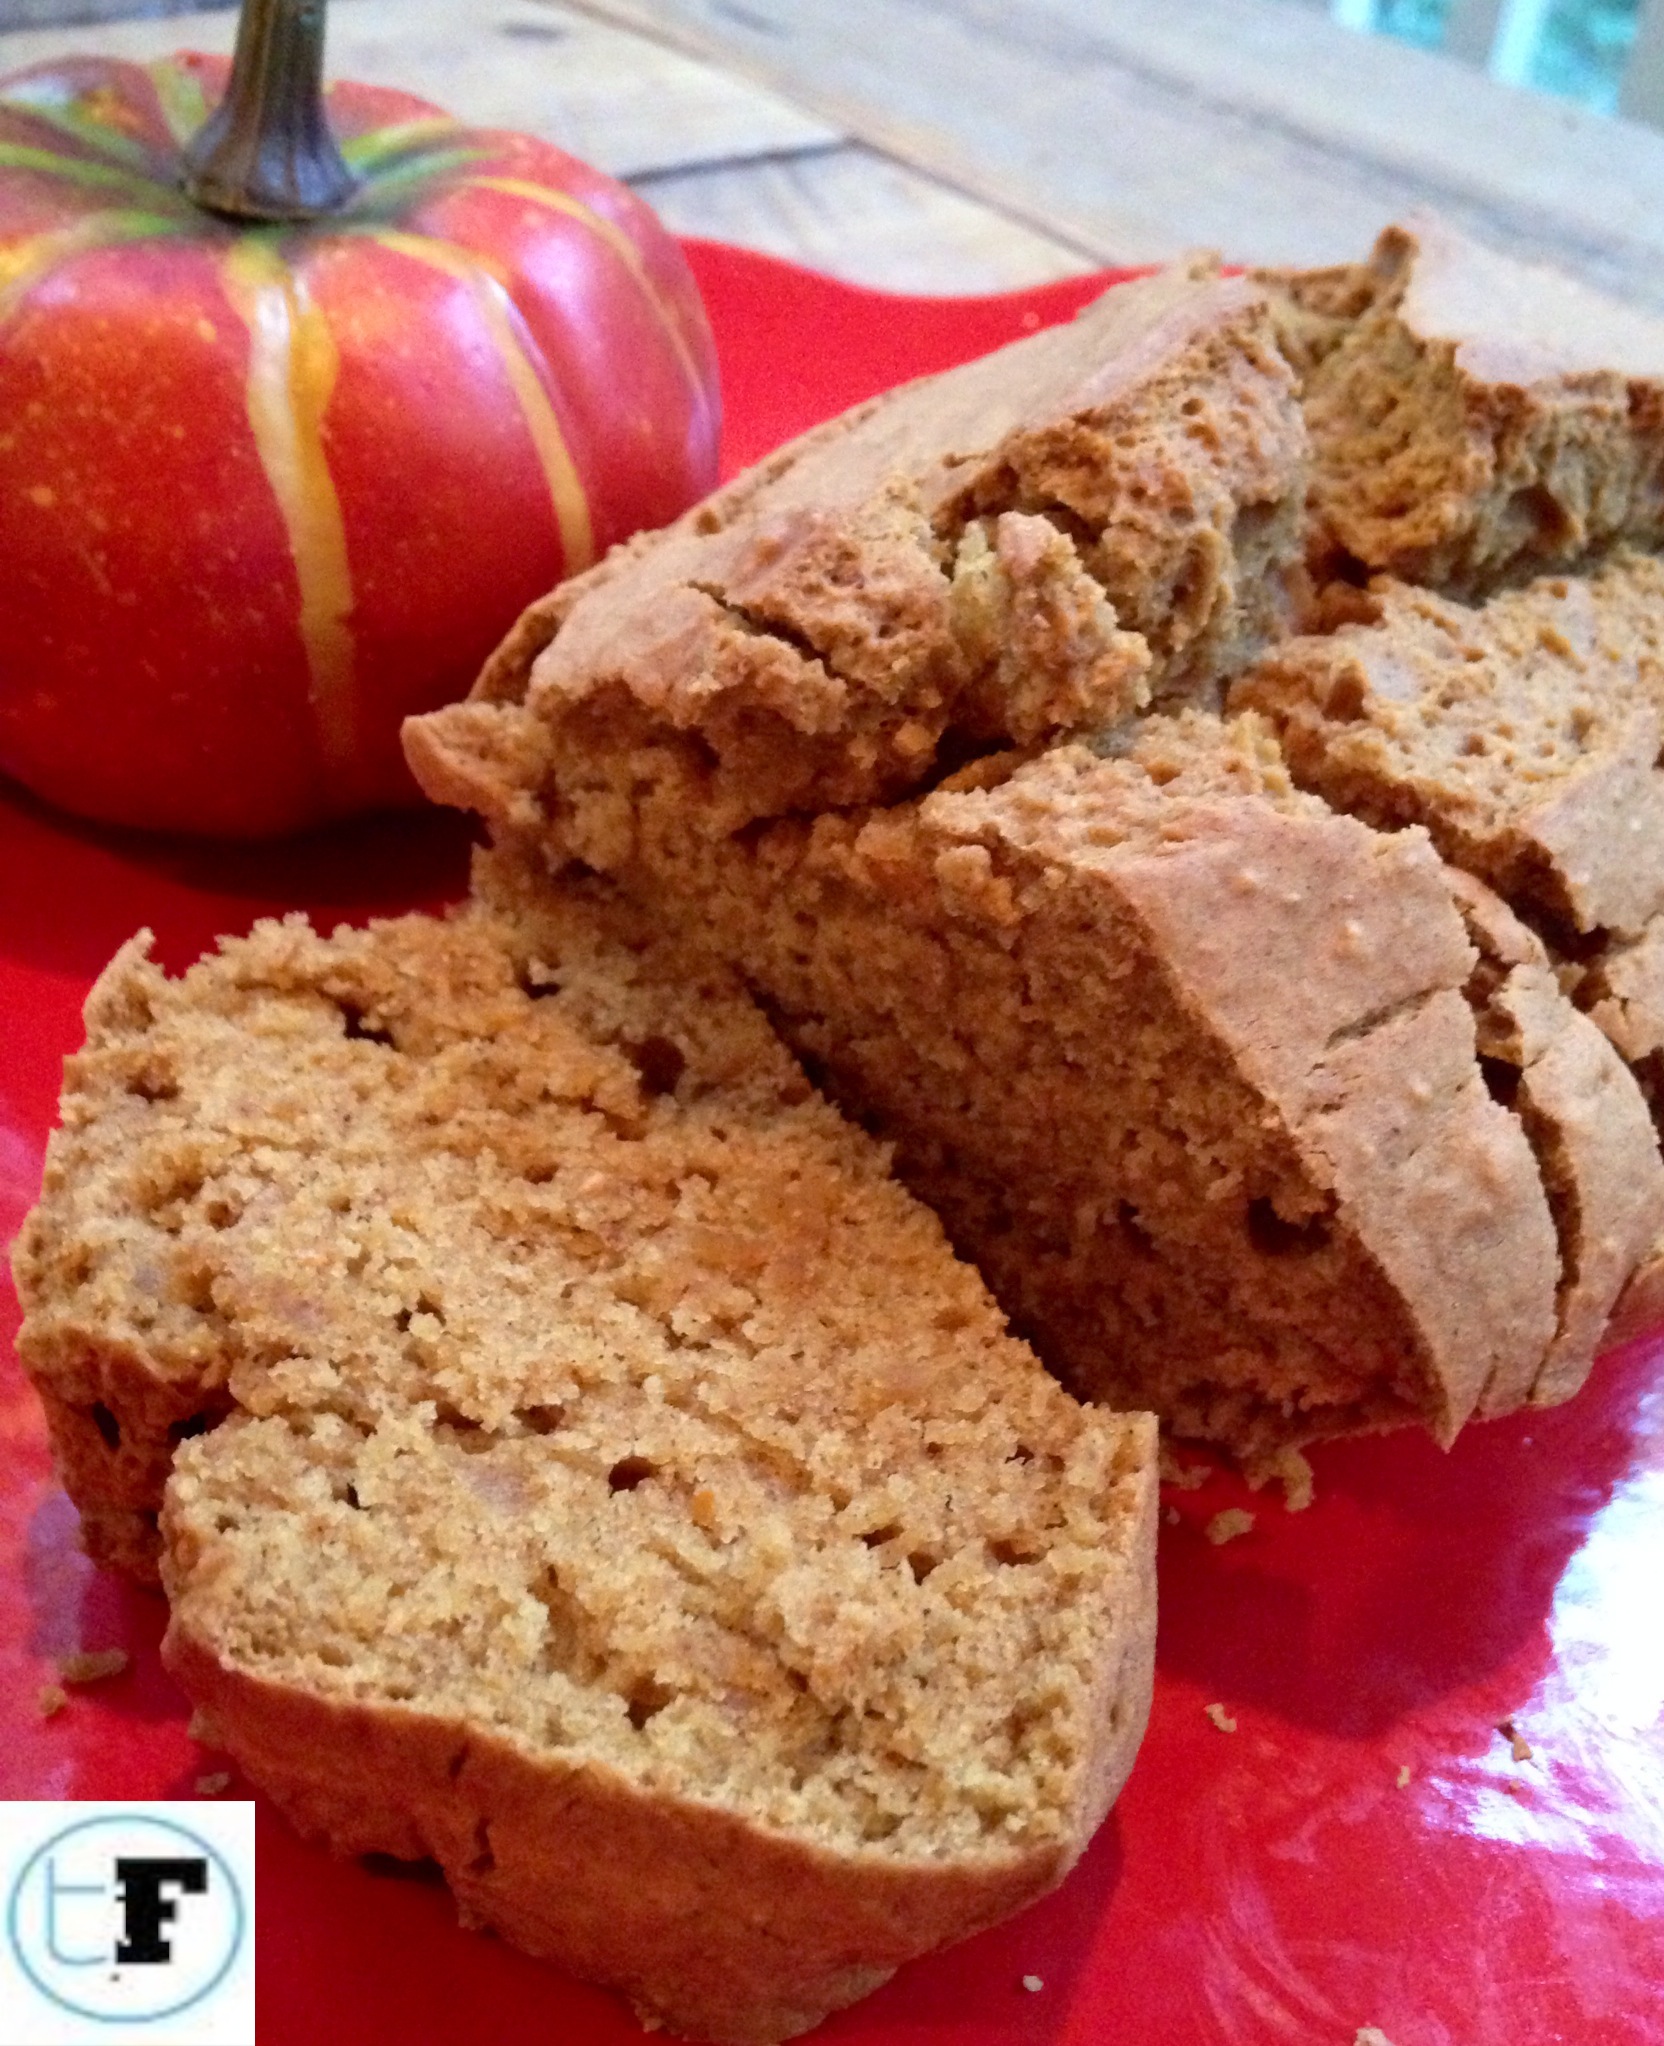
Porter's Favorite Pumpkin Bread

Ingredients

  • 1 cup light brown sugar
  • 2 large egg whites
  • 1 cup pure pumpkin (you can use canned organic pumpkin)
  • 1/3 cup Coconut Oil (melted)
  • 1/3 low-fat plain yogurt (2% organic greek yogurt or try pure coconut milk)
  • 1 teaspoon vanilla extract
  • 1 cup all-purpose flour
  • 1 cup whole wheat flour
  • 1 & ½  teaspoon baking powder
  • 2 teaspoons  ground cinnamon
  • ½  teaspoon ground nutmeg
  • 1/2 teaspoon baking soda
  • ½ teaspoon salt

Directions

  1. Preheat oven to 350 degrees F. Spray 8 1/2 by 4 1/2 metal loaf pan with nonstick cooking spray & sprinkle with flour.
  2. In large bowl, with wire whisk, combine brown sugar and egg whites. Add pumpkin, oil, yogurt, and vanilla extract; stir to combine.
  3. In medium bowl, combine all-purpose flour, whole wheat flour, baking powder, cinnamon, nutmeg, baking soda, and salt. Add flour mixture to pumpkin mixture; stir until just combined. Do not overmix.
  4. Pour batter into prepared pan. Bake 45 to 50 minutes or until toothpick inserted in center of loaf comes out clean. Cool in pan 10 minutes. Invert pumpkin bread onto wire rack; cool completely.

IMG_8706

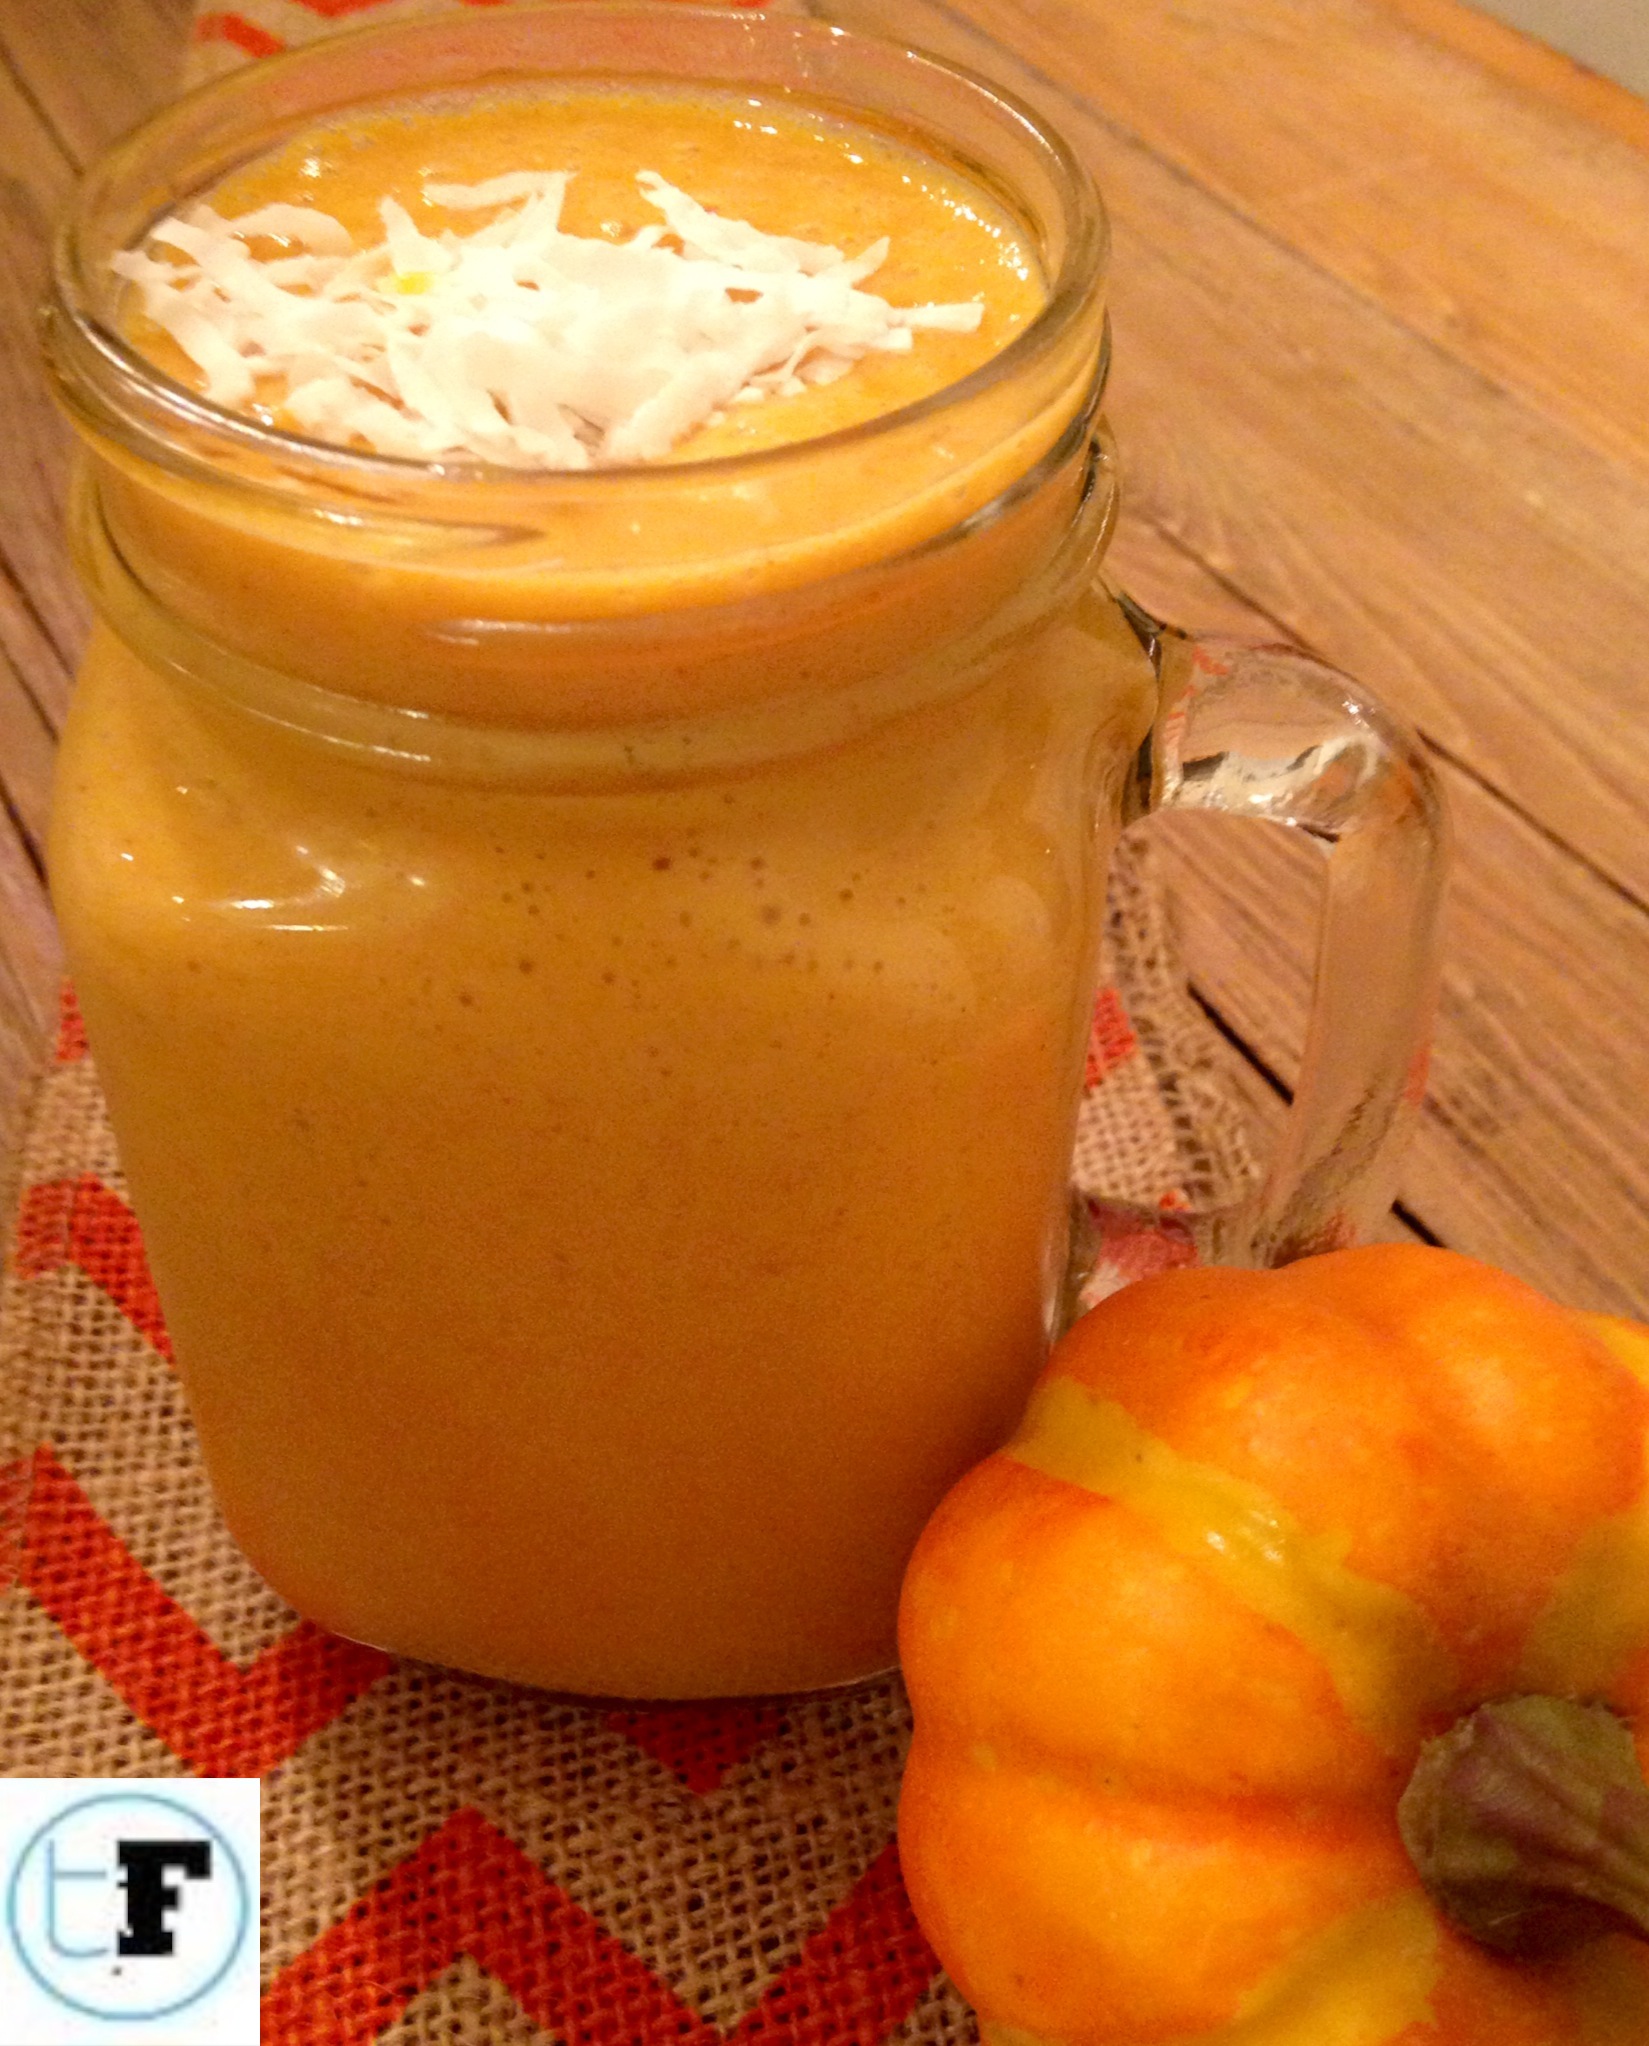
Pumpkin Pie Protein Smoothie

(Makes 1 serving) Ingredients

  • 1 cup Almond Milk
  • 1/2 cup pumpkin (I used pureed, canned, organic)
  • 1 serving Vanilla Protien Powder
  • 1 frozen banana
  • 1 TBSP Ground flax seed
  • 1 tsp. Pumpkin Pie spice (no sugar added)(nutmeg, ginger)
  • 1 tsp + Cinnamon
  • ½  tsp Vanilla extract
  • Crushed ice to fill - (you can also throw in a few small carrots for extra veggies!

Directions

  1. Place all ingredients in a blender, and blend till smooth.
  2. Pour it into a pretty glass, top with cinnamon, coconut & enjoy

Photo by Whole Foods

Pumpkin Turkey Chili

Ingredients

  • 2 lb. 99% lean ground turkey breast
  • 3 15 oz. cans of great northern beans, or kidney beans
  • 1 15 oz. cans of pumpkin puree
  • 1 onion, chopped
  • 3 cloves of garlic, minced
  • ½ Tbsp Chili powder
  • 1 Tbsp..Cumin
  • 1 Tsp. Oregano
  • 2 tsp. black pepper
  • 2-3 cups of low sodium chicken broth
  • 1 tsp. olive oil
  • Salt to taste

Directions

  1. Spray a large frying pan with oil, and over medium, cook the turkey, onion, and garlic  for about 4-5  minutes or until mostly white
  2. Pour into large pot or crock pot the beans, pumpkin, peppers, spices and broth.
  3. Mix in the pot and let simmer or crockpot and set on LOW for 8 hours or HIGH for 4 hours.
  4. Garnish with avocado, greek yogurt, cilantro, and salsa! Enjoy!

IMG_8635

"I am Thankful" Pumpkin Craft

Materials

  • orange and green construction paper
  • staples or brads
  • scissors

Directions

  1. Cut out 8 pieces of orange contraction paper into 1 inch strips.  You will also need to cut out 2 leaves and 2 skinny strips of green contraction paper for the vines
  2. Have the kids write something they are thankful for on each strip of orange construction paper.  Be sure to leave about a 1 inch space on the sides of the strip so the writing isn't covered up when stapled together
  3. Use a stapler or brads to attach the orange strips at the top and then at the bottom to form a pumpkin.
  4. Add your leaves and green vines.  I rolled up the green construction in a paper to help curl the vines.

We are also thinking about heading out to a pumpkin patch or corn maze soon while the weather is so nice. Being active as a family is a great way to stay healthy, and for us to spend some time together. Plus it gives the little people a perfect opportunity to pick out their favorite pumpkins and to tire themselves out a bit on a hayride or in the corn maze.

There are two farms nearby that offer these fun activities: Washington Farms and Athens Corn Maze. Pick the one closest to you and take your kids on an adventure this fall!

Blessings,

Caroline

September Food Journal Results and The October Squat Showdown!

october-squat-challenge.jpg

September was a great month for TransFit and I'm so proud of everyone that joined me in the food journal challenge! I received so many updates from friends saying that once they started tracking their food, they started making some changes in their diets for the better!

This month's winners were:

  • Colleen Pruitt- winner of the Nutrition Consulting Session
  • Luci & Mac Furlow- winners of the $50 EarthFare gift card
  • Pam Adams- winner of $25 off her TransFit training sessions

Awesome job to everyone else who completed or tried the challenge! Alison Norris, Katie Woodall, Lauren McElhannon, Velena Vego, Lacy Sinkwich, Nancy  Deleski, Yvette Jackson, Judy Talton, Leslie Dorris. Katie Collins, & Kim Pittard- you all did amazing and I'm so proud of your hard work!

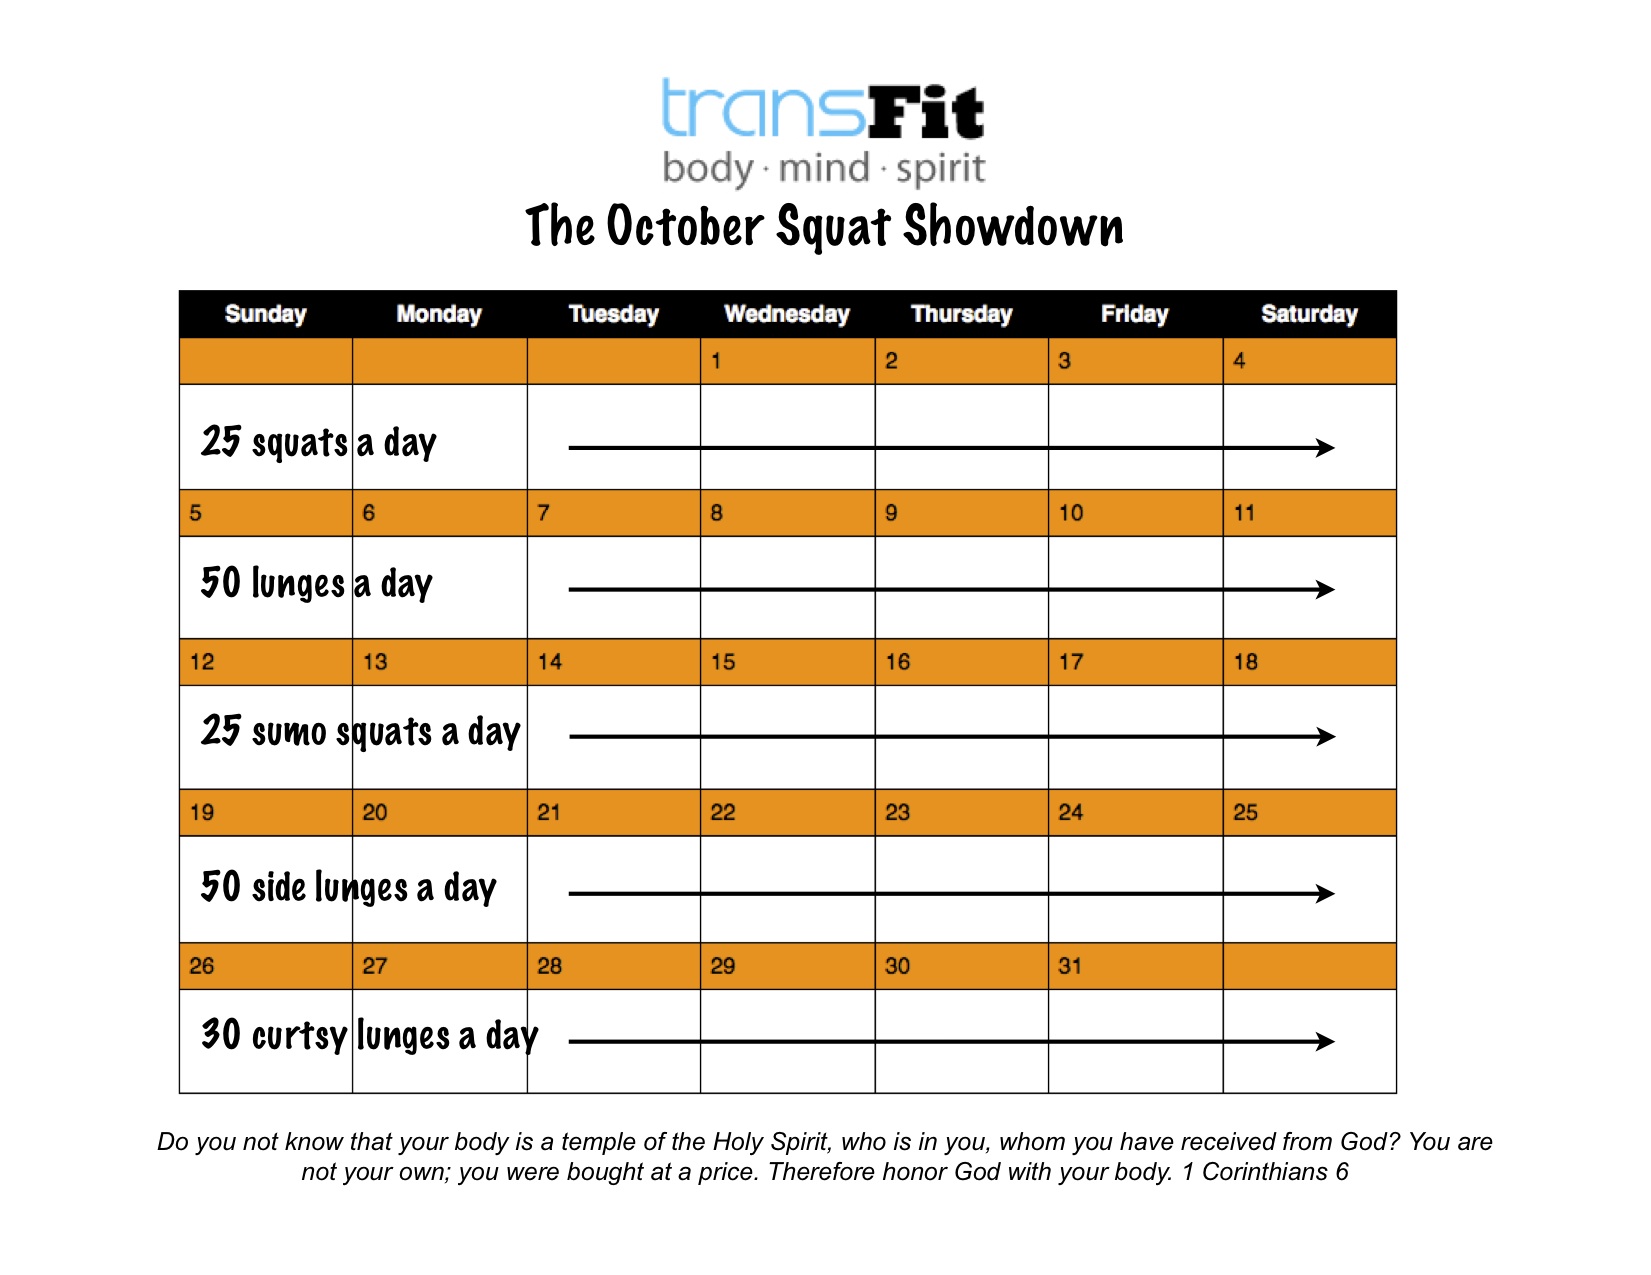
Now October is here and it's time for a new challenge! This month I wanted to focus on building strong legs, especially for those of you training for half or full marathons or 5k's. The October Squat Showdown is all about building a strong base through different squats and lunges so that we can be healthy and ready to tackle any challenges ahead.

Each week will have a different activity. You will do this activity every day for the week to really feel the burn and strengthen your muscles. The good news is every activity is simple and should only take a few minutes to add into your routine! Do some squats while folding laundry or do your lunges while cooking dinner. By the end of the month you will realize how easy it is to add some exercise into your daily routine. If you want an extra challenge, add in a few more squats or lunges each day!

october squat challenge

Click on the calendar above to download a copy of this month's challenge and prepare to work those legs!

Screen shot 2014-10-01 at 1.28.19 PM

FALL HARVEST APPLE SALAD

 PREP TIME: 5 mins

 Light, healthy and packed full of fiber and protein, this apple harvest salad is perfect for lunch or dinner. Fall has never tasted so fresh!

INGREDIENTS

  • 3 c. lightly packed spinach
  • ¼ cup Quinoa or Farro
  • ½  cup cooked (but not mushy) sweet potato
  • 1 small or medium apple, cut into chunks
  • 2 tbsp. pumpkin seeds
  • 3 tbsp. dried cranberries
  • 3 tbsp. chopped walnuts or cashews
  • 1 tbsp Goat Cheese

For the vinaigrette:

  • 1 tsp. minced shallot
  • 2 tbsp. balsamic vinegar
  • 1 tsp fig preserves or maple syrup
  • 3 tbsp. extra-virgin olive oil
  • pinch of salt and freshly ground pepper

DIRECTIONS

  1. Add greens to a large dinner plate or salad bowl. Top with the cooked (and cooled) quinoa, apple chunks, pumpkin seeds, dried cranberries and walnuts.
  2. To make the vinaigrette, combine the shallot and vinegar in a small mixing bowl, whisk to combine. Slowly add the olive oil by pouring in a steady stream, whisking vigorously until emulsified. Drizzle the salad with the dressing and serve immediately.

If you plan on making this salad for dinner, try adding slices of chicken or if you're vegetarian try adding cubes of roasted butternut squash or sweet potato. Enjoy and please email me if you have any questions!

Blessings,

Caroline

Finishing the Food Journal Challenge Strong!

transfit-journal-template.jpg

The end of September is almost here, and that means the Food Journal Challenge will soon be over. I've been so energized by the responses I've received thus far, and I can't wait to see what the rest of September will have in store for us! To all those who have submitted their log to me every week -keep up the good work! To those who missed a week or decided to start the challenge late -remember that it's never too late to start changing your life for the better!

"Whatever is true, noble, right, pure, lovely, admirable, excellent, or praiseworthy, think on such things." Philippians 4:8

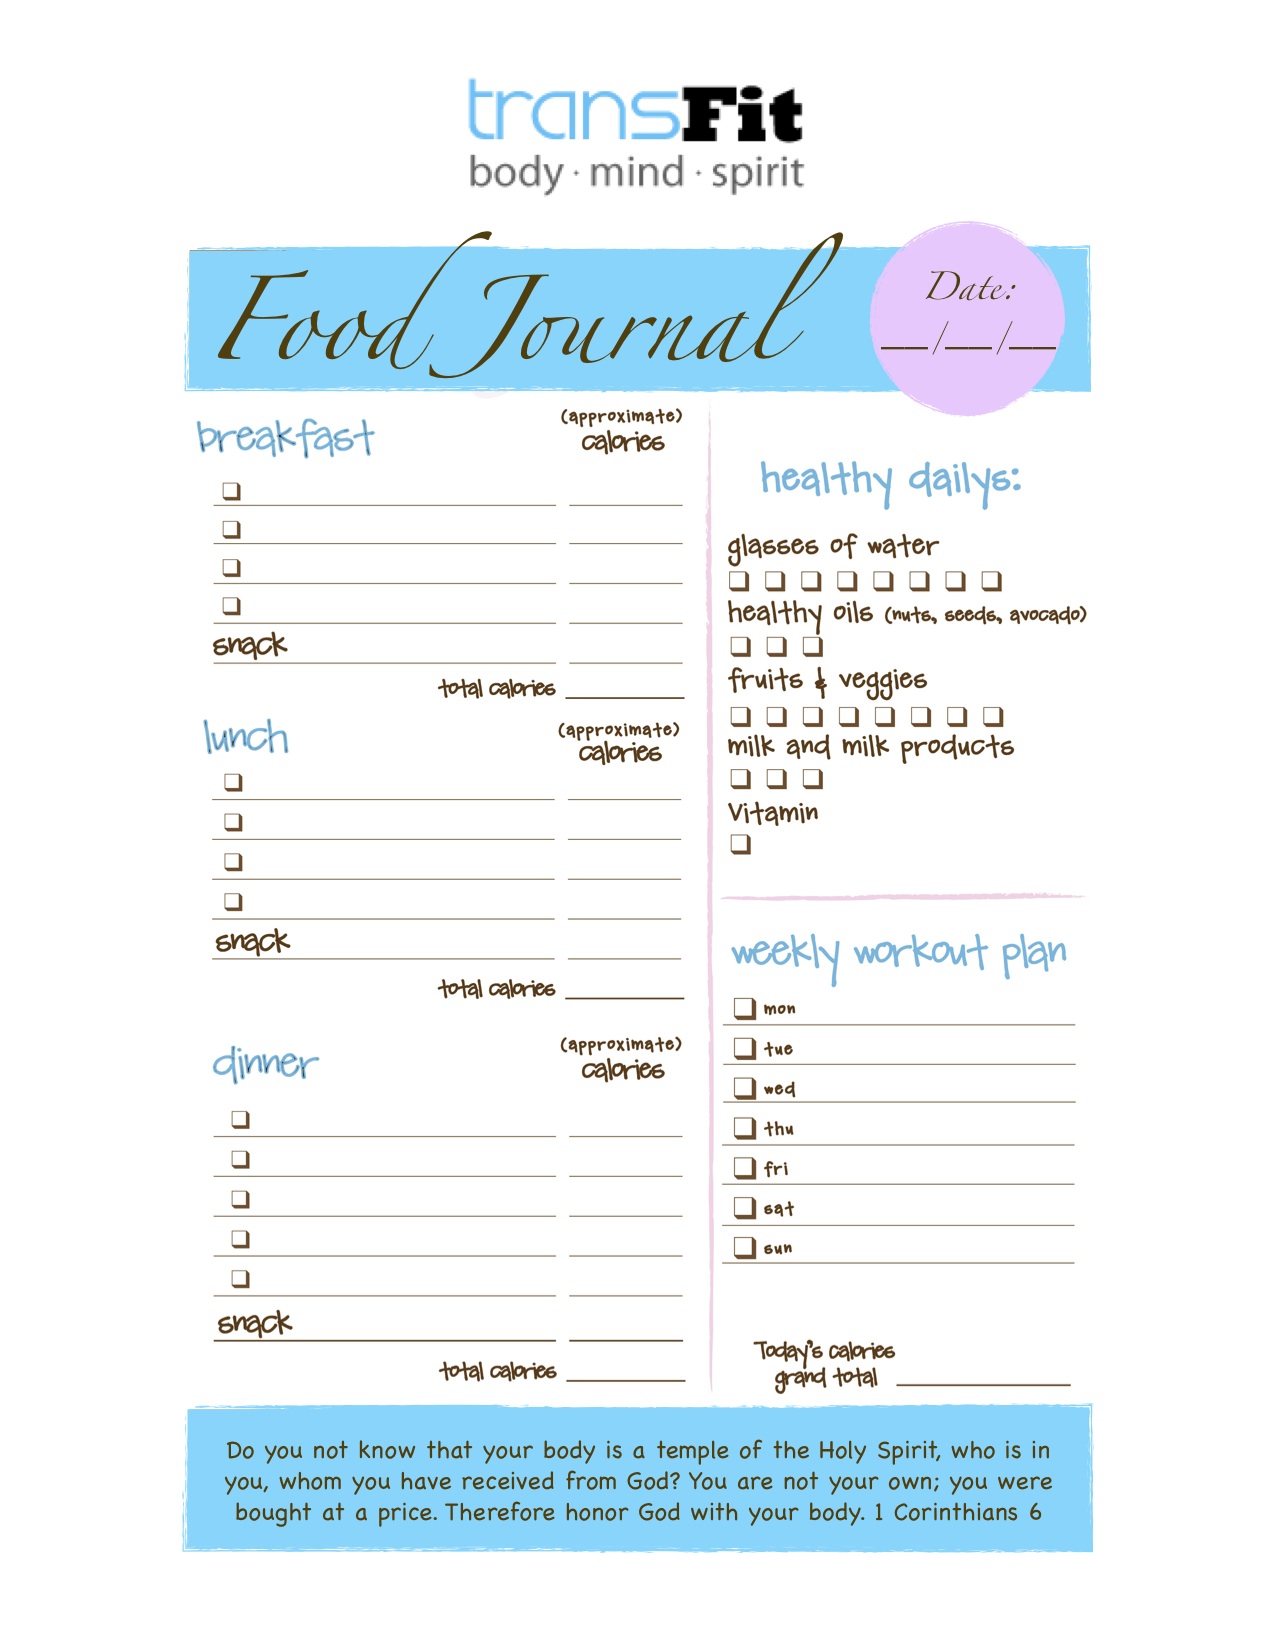
Let's fill our mind with positive thoughts and inspiring goals for the remainder of September! You can download my food journal template below to help keep track of all the amazing work you are doing. I am so proud to have so many hardworking clients and friends!

transfit journal template

If you need any help planning meals, remember that I just started offering a weekly meal planning service. For just $10 per week, I will send you a  pdf meal plan for the week including every meal and snack recipe you need for a well-balanced diet! I can also customize these plans based on vegetarian needs or other dietary restrictions. If you have any questions, please do not hesitate to contact me at transfitathens@gmail.com and if you'd like to purchase this service you can do so by clicking the PayPal button below.

Buy Now Button with Credit Cards

And just in time for football season, here is a quick and easy recipe I love to bring to tailgate. Serve it with carrot chips for an extra serving of veggies or serve it with homemade pita chips or tortilla chips. Yum! 

Cowboy Caviar

Photo by: Norman Plate

Ingredients 

  • 2 tablespoons red wine vinegar
  • 1 1/2 teaspoons Hot sauce
  • 1 Tablespoon Extra Virgin Olive Oil
  • 1 clove garlic, minced
  • 1 firm-ripe avocado
  • 1 can (15 oz.) black-eyed peas or black beans
  • 1 can (11 oz.) corn kernels
  • 1/3 cup thinly sliced green onions
  • 2/3 cup chopped fresh cilantro
  • 1/2 pound Roma tomatoes, coarsely chopped
  • Salt & pepper to taste

Directions

1. In a large bowl, mix vinegar, hot sauce, oil, garlic, salt & pepper. Peel, pit, and cut avocado into 1/2-inch cubes. Add to vinegar mixture and mix gently to coat.

2. Drain and rinse peas and corn. Add peas, corn, onions, cilantro, and tomatoes to avocado; mix gently to coat. Add salt to taste.

Blessings,

Caroline
Meal Plan for the week and New Fall Recipes!

photo-18.jpg

Who says you have to be a great cook to be healthy? I hear this statement and “I am just too busy to eat healthy” countless times in my studio each week. Let’s shift our thoughts to the positive! Start today and plan your menu for next week. As always I asked for input from my kids and they truly enjoy the opportunity to decide what will be on their plates for the next few days. 

photo (18)

Try cooking just two meals next week and that alone can help your healthy lifestyle! For these two meals I decided to try out some new recipes, keeping in mind that I wanted good sources of protein as well as the opportunity to use some fresh seasonal veggies. 

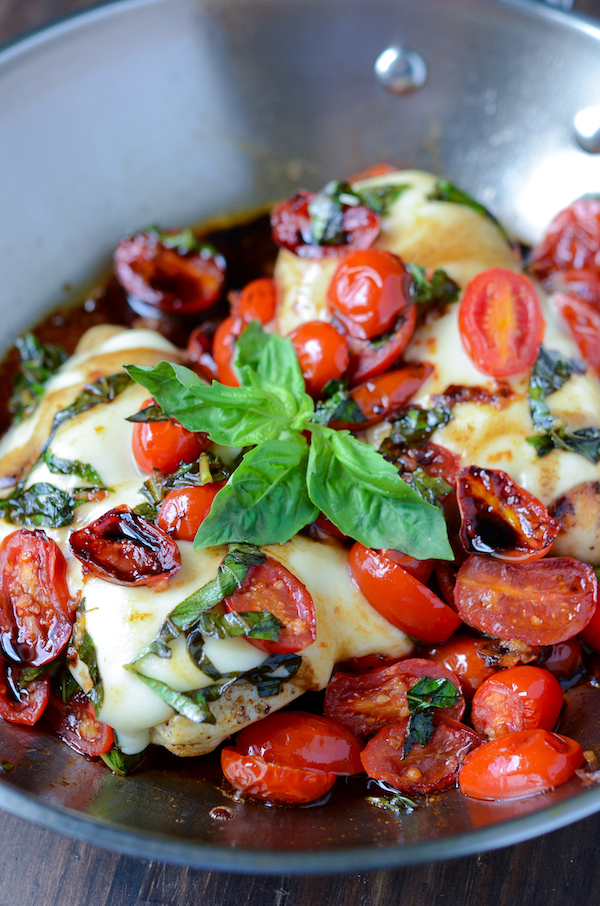
The first recipe up was Caprese Chicken. I love, love, love fresh basil and tomatoes so when a friend passed this recipe along to me I had to give it a try! Delicious! 

Photo by: The Novice Chef Blog

Caprese Chicken

Yield: 4 servings

Ingredients:

  • 4 skinless chicken breasts
  • kosher salt & freshly ground black pepper
  • 2 tablespoons olive oil, divided
  • 2 large garlic cloves, minced
  • 2 pints cherry tomatoes, halved
  • ¼ cup large basil leaves, finely chopped (the more basil the better)
  • 8 oz fresh buffalo mozzarella, sliced in 1/2 inch thick slices
  • balsamic vinegar, to taste

Directions:

  1. Salt and pepper both sides of the chicken breasts and set aside.
  2. In a large sauté pan over medium-high heat, warm 1 tablespoon olive oil. Add chicken, cover pan, and cook for about 10 minutes. Flip chicken breasts and continue cooking until the chicken is cooked thoroughly (or has reached an internal temp of 165°F).
  3. While chicken is cooking, in a medium sauté pan over medium-high heat, warm remaining 1 tablespoon olive oil. Add garlic and cook for about 1 minute, or until fragrant. Add tomatoes and continue sautéing until tomatoes skin starts to soften/wrinkle, about 5 minutes. Remove from heat and stir in basil. Set aside.
  4. Top each chicken breast with 1-2 slices of mozzarella. Pour tomato mixture on top. Cover pan with lid once more and let the mozzarella melt, about 1-2 minutes.
  5. Lastly, drizzle with a splash of balsamic vinegar and serve immediately.

The next recipe I wanted to try was turkey meatballs. The kids love meatballs, and by serving them over spaghetti squash instead of traditional pasta we can get in an extra serving of veggies! Honestly, I had the spagetti squash, they had whole wheat angel hair pasta! But they had 3 polite bites of  spagetti squash which is a start! 

Photo By: Sally Cameron

Terrific Turkey Meatballs

Serves: about 5 (makes 26 small meatballs)

Ingredients

  • 1 pound fresh ground turkey
  • 6 tablespoons breadcrumbs (can substitute crackers or GF breadcrumbs)
  • 1/2 teaspoon red chile pepper
  • 1 tablespoon fresh chopped oregano
  • 1 tablespoons fresh chopped parsley
  • 1/2 cup finely chopped onion
  • 1/4 cup grated Parmesan
  • 3 cloves garlic, minced fine
  • 2 teaspoons olive oil (plus extra for pan)
  • 1 egg
  • 1/2 teaspoon sea or kosher salt
  • 1/4 teaspoon pepper
  • 3-3 1/2 cups marinara pasta sauce
  • pasta or spaghetti squash to serve over
  • Parmesan and herbs to garnish

Directions

  1. In a medium bowl with your hands, mix ground turkey, breadcrumbs, red pepper, herbs, onion, Parmesan, garlic, oil, egg, plus salt and pepper.
  2. Line a baking sheet with foil, use tablespoon and portion out approximately 26 meatballs. Gently roll them into round balls.
  3. Drizzle a little extra olive oil (about 1-2 teaspoons) into a large non-stick pan. Over medium heat, cook meatballs on all sides until lightly browned, turning as needed.
  4. Pour marinara over the top and bring to a strong simmer, until bubbling hot, turn heat down to low, cover and cook until turkey is barely pink when you cut open a meatball, about 8-10 minutes.
  5. Serve over whole wheat pasta or spaghetti squash with the sauce and a garnish of grated Parmesan cheese and fresh chopped herbs if desired.

If making two meals seems daunting, try making one small change each week to drastically change your future. Last week we focused on adding in an apple a day. This week let’s focus on getting in one extra serving of veggies per day. Let it be raw carrots, or celery- you pick your favorite and add it in daily! Serve it as a snack or instead of bread with dinner have an extra serving of veggies. Adding in just one extra serving of vegetables can give you the essential nutrients your body needs to stay healthy and fight cravings!

For those of you who still feel a little overwhelmed with planning healthy meals and snacks, I would love to offer you some guidance on this journey. Enough clients and friends have come to me asking for weekly meal plans that I have decided to expand my service offerings and include weekly meal plans! For just $10 per week, I will send you a  pdf meal plan for the week including every meal and snack recipe you need for a well-balanced diet! I can also customize these plans based on vegetarian needs or other dietary restrictions. If you have any questions, please do not hesitate to contact me at transfitathens@gmail.com

If you are interested in purchasing a weekly plan, you can do so by clicking on the Buy Now button below.

Buy Now Button with Credit Cards


Blessings,

Caroline

September Food Journal Challenge is Back!

photo-11.jpg

Last year many TransFit clients and friends were very successful and had real results in just ONE month taking the Food Journal Challenge! I want YOU to do the food journal challenge again (or for the first time) this September!

photo (11)

What do I have to do?

Keep a food journal for 4 weeks in September! The journal can be an app (my fitness pal is great) or a written journal outlining the details of your meals and snacks throughout the day.

Food Journal Challenge

Why take the challenge?

Using a food journal is the number one way you can take control of your healthy lifestyle. Everyone struggles with what we put in our mouths and self-awareness helps us to realize what food and beverages we are actually fueling our body with daily. Journaling is an amazing tool for weight loss, assessing a food intolerance, or to treat a deficiency.  I have seen the MOST effective results with my nutrition clients who have kept a food journal and showed it to me weekly! The weekly accountability is the key to success with the journal. You can live anywhere and take this challenge. If you have time to complain or whine about your body, you have time to write down what you ate during the day. You bite it, you write it!  I am here for you and I will be your partner in this journey! Let’s do it – start today and you will see results!

Sample Food Journal

Daily Food & Fitness Log Sample 

The Rules:

Email, Text, Facebook, Instagram me that you are taking the September Food Journal Challenge and you will be entered in for a drawing to a win a $50 gift card to EarthFare and 1 free TransFit Nutritional Counseling Session (value $75). To be eligible you must text, email, or bring me a copy your food journal by Sunday for each of the next 4 weeks in September (the first week ends September 7th). Contest ends September 30th and whoever fills out their journal (honestly) weekly and sends it to me weekly (for 4 weeks) will be entered to WIN the PRIZE!  The biggest prize is that you will feel better knowing what you are putting in your body!

5 Helpful Tips to Get Started with the September 2014 

Food Journal Challenge!

  1. Find a journal or app (Lose it, My Fitness Pal, Fitbit) that you like and will use weekly.(I use a small notebook that fits in my purse.) Here is a good guide for your journal:
  2. Commit to writing in the journal everyday.
  3. Write down yourgoals for the month of September on the first page!
  4. Be honest! I am not judging you on what you eat- the challenge is for you to become a healthier person and to teach you a greater awareness of what you are eating daily!
  5. Clean out the pantry and refrigerator.  Start your month off right; any food or beverages that are tempting to you- TOSS! You don’t need it and neither does your family! Start this month fresh with a clean refrigerator and pantry so that you can restock with fresh fruits, vegetables, and whole grains.

We are all too busy, too hectic, or too unorganized but let's challenge ourselves this month!  Start your September off right!  

Proverbs 21:5 reminds us that, “Careful planning puts you ahead in the long run; hurry puts you further behind”.

Last week of August Weekly Menu Plan & Recipes!

afterlight.jpeg

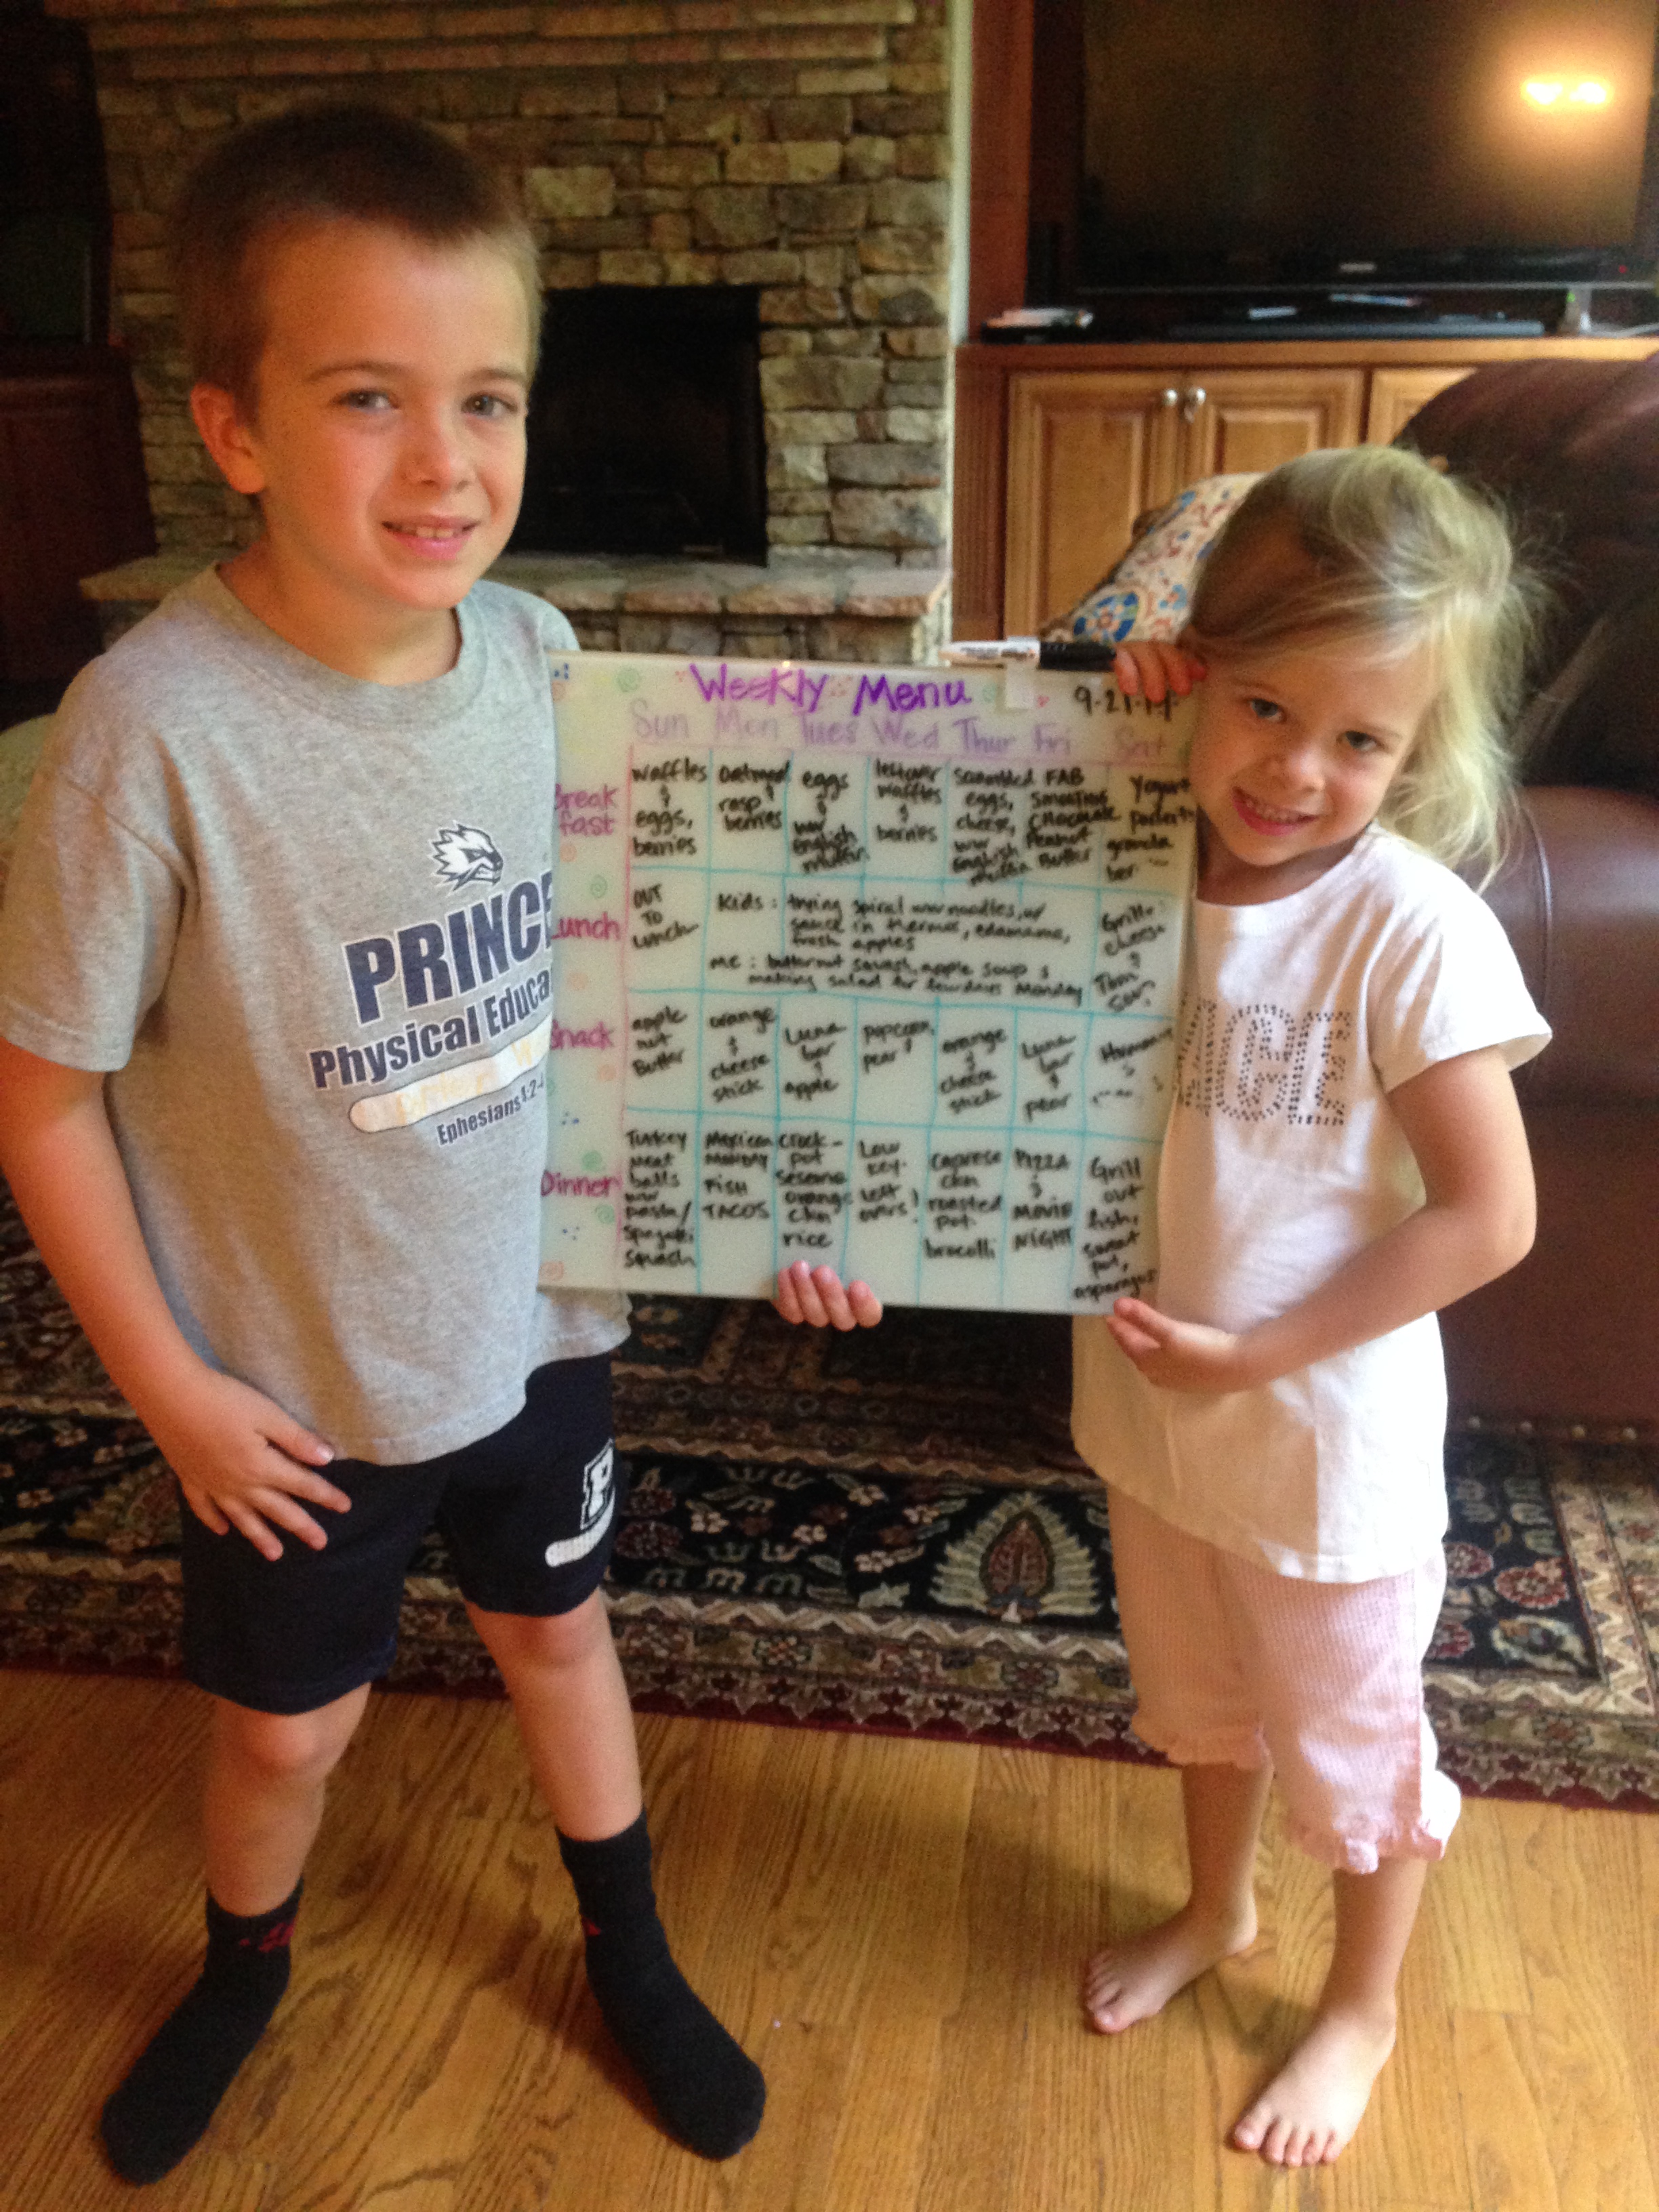
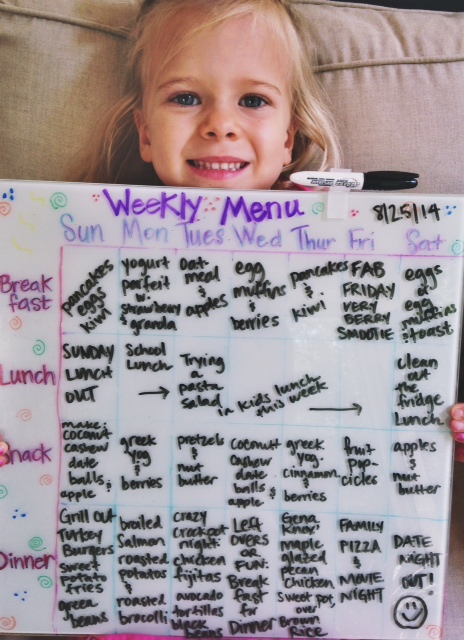
Last full week in August and can I say, Whhhheewww!!! August has been one busy month! One thing that really does help keep me not so frazzled is planning our weekly menu on the weekend.  I found this dry-erase board at Target and I used Sharpie markers for the headers and lines and each week we use dry-erase markers for the menu. I am going to be honest and tell you that we don't stick with this EXACTLY but most days we try to and it really helps the kids complain less at breakfast, snack, and dinner time since we have already talked about what we were cooking this week! Here is our menu plan for the week and a few recipes to help you in planning your weekly menu! The Pasta salad I am trying to make for the kids this week for lunch is here http://www.transfitathens.com/blog//2013/08/07/school-lunch-special/ !  afterlight


Easy Scrambled Eggs Muffins

Easy Egg Muffins

  • Makes: 12

    Ingredients:

  • 9 eggs
  • 1/2 cup chopped fresh spinach
  • 1/3 cup 2% milk
  • 1/3 cup whole wheat flour
  • 1/4 cup 2% grated cheddar cheese
  • 1 Tbsp chopped fresh basil
  • 1 small tomato, chopped
  • 1/2 tsp sea salt
  • 1/2 tsp cracked black pepper
  • Diced Ham is optional

( I make half of themuffin cups just ham & cheese and I make the rest full of veggies)

Preheat oven to 350. Break the eggs into a bowl and whisk. Add the rest of your ingredients and mix it all together. Add spoonfuls of the mixture to a nonstick muffin tin or a tin sprayed with nonstick coating. I used a 1/4 C measuring cup to transfer the mixture. Pop them in the oven and bake for 25 to 30 minutes, or until done. They freeze well too!


No-Bake Energy Bites

(“cookie dough balls” as I told my little people)

gimme

Minutes to Prepare: 15

Number of Servings: 24

Ingredients

1 cup oatmeal (I put this in the blender 1st)

1/2 cup peanut butter (or other nut butter
)

1 cup coconut flakes

1/3 Cup Honey

1/2 cup ground flaxseed (GO FIBER)

1 tsp vanilla

Nutritional Info
*

Directions

Stir all ingredients together in a medium size bowl until thoroughly mixed.  Let chill in the refrigerator for half an hour.  Once chilled, roll into balls of whatever size you would like.  (Mine were about 1″ in diameter.)  Store in an airtight container and keep refrigerated for up to 1 week.  Makes 18-24 balls


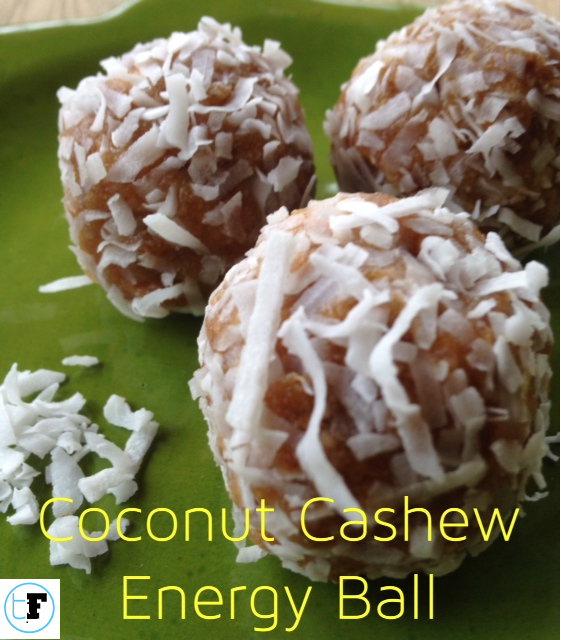
Coconut Cashew Energy Balls! (Gluten Free)

coconut cashew energy ball

Yield: 12

Ingredients:

  • 1 Cup Pitted Dried Dates (9-10 dates)
  • 1 Cup Cashews
  • ½ Cup unsweetened Coconut flakes
  • 1 tsp Cinnamon
  • 1 tsp Pure Vanilla Extract
  • 1 Tbsp. Coconut Oil

Instructions:

Soak the Dates in water for 10 minutes to soften. Place all ingredients into food processor or blender and process for approximately 2 minutes until everything is ground. Roll into Balls.  Spread coconut flakes on plate and roll ball on flakes to cover!  Makes approximately 15 tablespoon sized balls. Store in the refrigerator. Perfect easy to make treat for the entire family! Yum!

Chicken Fajita's in the Crock Pot

Chicken Fijitas

( 5-6 servings)

  • 1 1/2 pound chicken breast
  • 2 peppers (your favorite)
  • 1 onion
  • 1/2 cup chicken broth
  • taco seasoning packet (no msg)
  • 1 tsp. chili powder
  • 1/2 tsp. paprika
  • 1 tsp. salt

You will also need tortillas, cheese, cream, etc.

When it’s time to cook it, dump it all in your slow cooker and cook on high for 3-4 hours or low for 5-6 hours. When it’s cooked, shred the meat and add it back to the pepper mixture and serve on warm tortillas and your favorite toppings.

Hope you enjoy & happy planning!!! Blessings, Caroline 

Weekly Menu Plan

I am so thankful so many people enjoyed seeing the meal plan that was posted last week. I hope that the menu helped your family stay prepared and organized last week. The basics of meal planning takes a few steps: take 20 minutes to talk with your family about the week ahead, get input for everyone about what they would like to eat, include variety, keep it simple!!! Earthfare has chicken on sale this week so our menu has a little extra chicken in it than normal! Here is my handsome model, Porter, holding our dry-erase board meal plan for the week ahead. I make my grocery list from the weekly meal plan and shop either Saturday, Sunday, or Monday. Crazy busy weekend so I had to workout on the meal plan this morning! We typically make snacks (freezer yogurt pops, no bake energy balls,ect) on Sunday in anticipation of a busy week! Please feel free to email me with questions or comments!!!  If you would like me to design a specific meal plan for your family or if you are training for a specific event please email me at carolineward@bellsouth.net

Blessings, Caroline
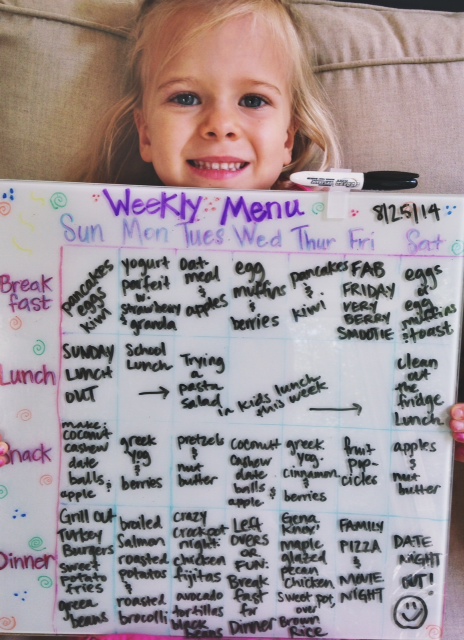
 

Porter helping me with the menu this week!

Many of these recipes are on the TransFit blog in the food section(http://www.transfitathens.com/blog//food)! Here is one of my all time easy family favorites! (For leftovers I drain the chili and put the chicken and white beans in a tortilla for soft tacos).

Crockpot White Chicken Chili

Whie Chicken Chilli

Crockpot White Chicken Chili

Ingredients

  • 1 32-ounce box chicken stock(organic)
  • 5 cups cooked chicken (rotisserie or boiled)
  • 4 cans white beans, left undrained
  • 1 16-ounce jar salsa(use fresh salsa-- this the key)
  • 1 8-ounce block pepper jack cheese, grated
  • 2 teaspoon ground cumin
  • 2 cloves garlic, minced
  • Black or white pepper to taste
  • 1/2 cup finely crushed corn chips
  • Sour cream or greek , avocado & cilantro, for garnish

Yields: 6 servings

Preparation

Place all ingredients except the corn chips in a crock pot. Cook on low 4-6 for  until the cheese is melted. (you can always add cheese at end)

Chili may also be cooked on the stove top over medium-high heat until cheese is melted.

When the chili is ready, add the crushed corn chips, if using, and simmer for 10 minutes to thicken. Garnish with more chips, cheese and/or sour cream and serve. ENJOY!!!

The most amazing Zucchini Bread Recipe!

img_5281.jpeg

IMG_5281

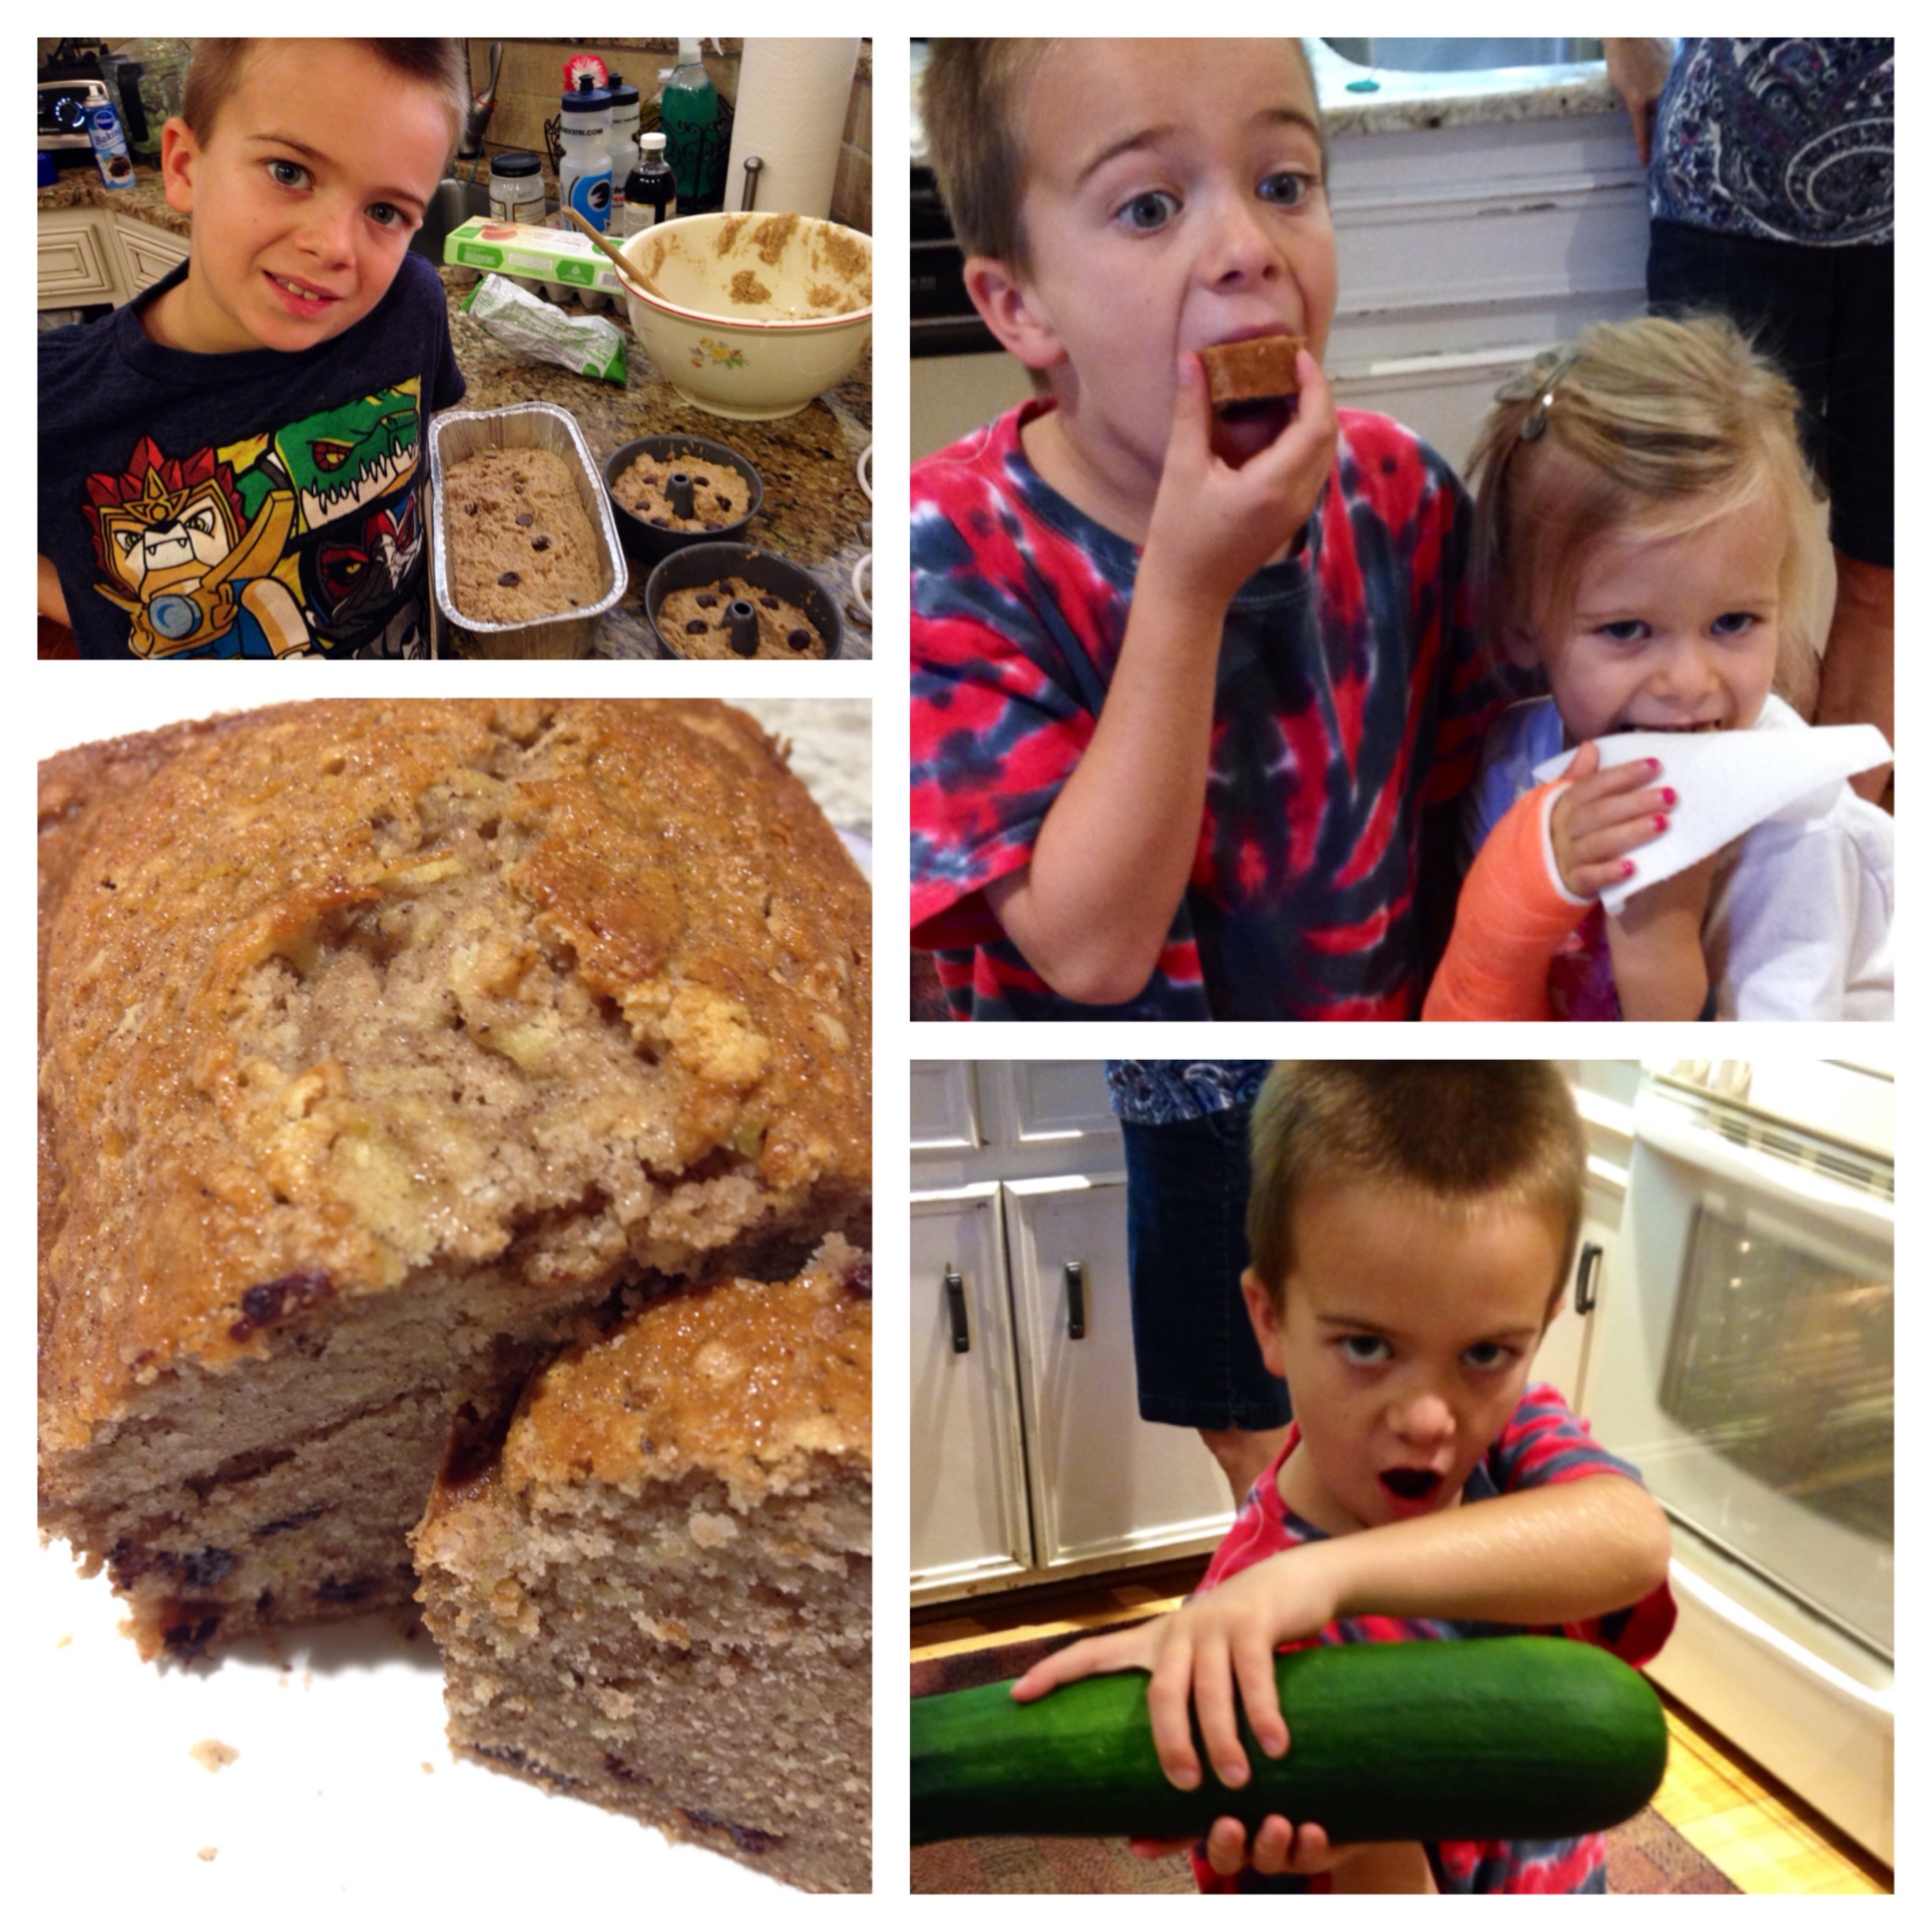
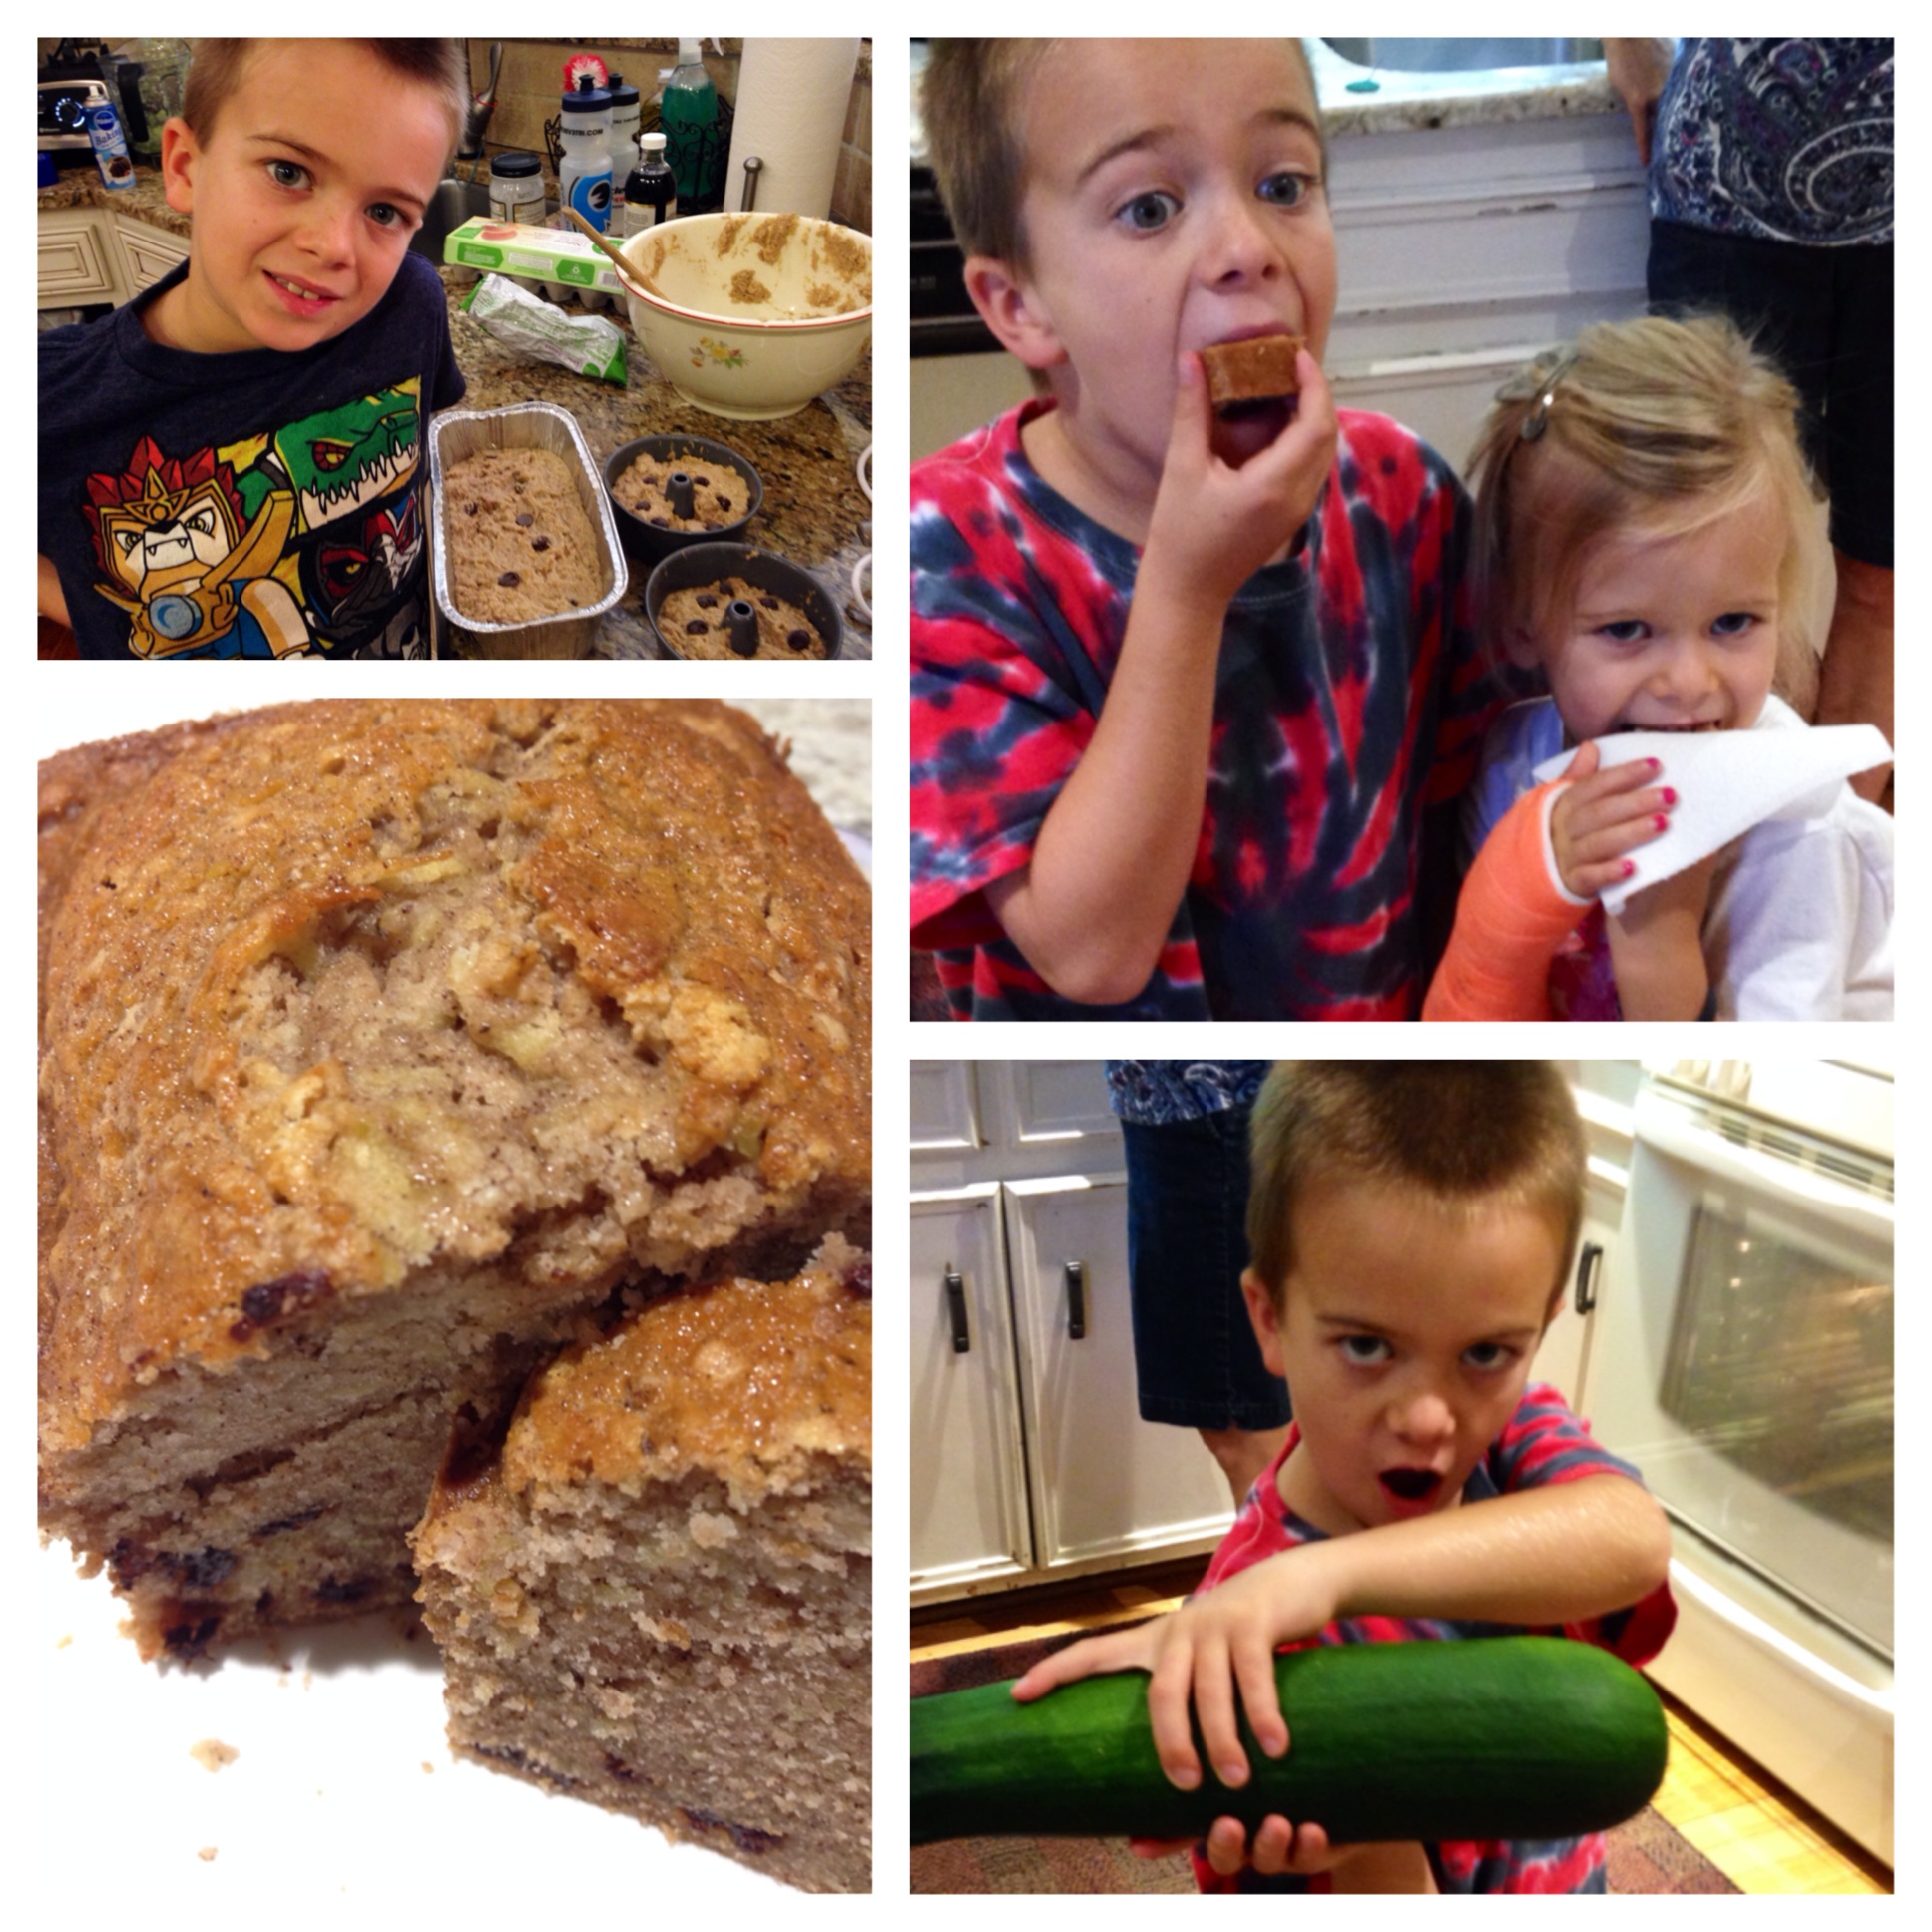
While staying with my parents in North Carolina last week, we were excited to see that Nan-Nan actually can grow things in her garden (we have not been so successful this year)!  Porter went peaking around the brush of the garden and found 3 monstrous zucchini! He was so proud and like most little boys immediately started using the large zucchini as a sword!!!  Zucchini swords was a new one to me but hey- he was playing with veggies- I was happy! One of Porter's favorite TV shows is Master Chef Junior (on FOX) and now he wants to help with anything and everything in the kitchen! Fun but tricky as all ingredients are toys and all utensils are weapons (in true boy fashion). Regardless of the MAJOR mess that was made, we had fun creating, tasting, and baking a healthy version of zucchini bread.  We knocked out crafting and cooking in one activity --check! A great breakfast (Kaitlyn spreads peanut butter on her piece) or afternoon snack that everyone can enjoy! Hope you like it!

Blessings, Caroline
Zucchini Bread

Ingredients:

  • 3 eggs (farm fresh are best)
  • 1-cup coconut oil (melted)
  • 1 cup of local honey (or 1 cup sugar)
  • 2 cups grated zucchini (with green peel), excess liquid squeezed out
  • 1 TBSP vanilla
  • 3 cups flour (white-wheat is a good option or mix regular with wheat)
  • 1 TSP baking soda
  • 1 TSP baking powder
  • 1 TSP salt
  • 1 TBSP cinnamon
  • Optional: can add 1-cup chocolate chips

Directions:

  1. Combine first 5 ingredients in a large bowl.
  2. Add dry ingredients and stir until well mixed; do not beat.
  3. Fold in optional ingredients.
  4. Pour in 2 greased and floured loaf pans
  5. Bake at 325 degrees for 55 to 60 minutes, until top is completely dry.
  6. Remove from pan(s) and let cool on a wire rack. A loaf freezes well.

    Zucchini Bread

Blueberry Cashew Bliss Smoothie

screen-shot-2014-06-26-at-6-49-26-pm.png

Screen Shot 2014-06-26 at 6.49.26 PM

Since it is blueberry season, I have decided to share this delicious blueberry smoothie! Blueberries are SO nutritious! They are a very good source of vitamin K, vitamin C, and manganese. Blueberries are also a good source of fiber and copper! A study done by Harvard researchers found that blueberries can help improve memory loss that comes with aging! Blueberries have also been shown to be beneficial not only for improvement of memory, but for slowing down or postponing the onset of other cognitive problems frequently associated with aging! There are so many wonderful benefits of blueberries, so enjoy  an afternoon with the family picking fresh blueberries at a local farm! Even Lyla enjoyed this blueberry smoothie! Hope you all enjoy!!

IMG_1635

Spaghetti Squash- a great pasta substitute!

spaghetti-squash-side-dish-close-up-1024x701.jpg

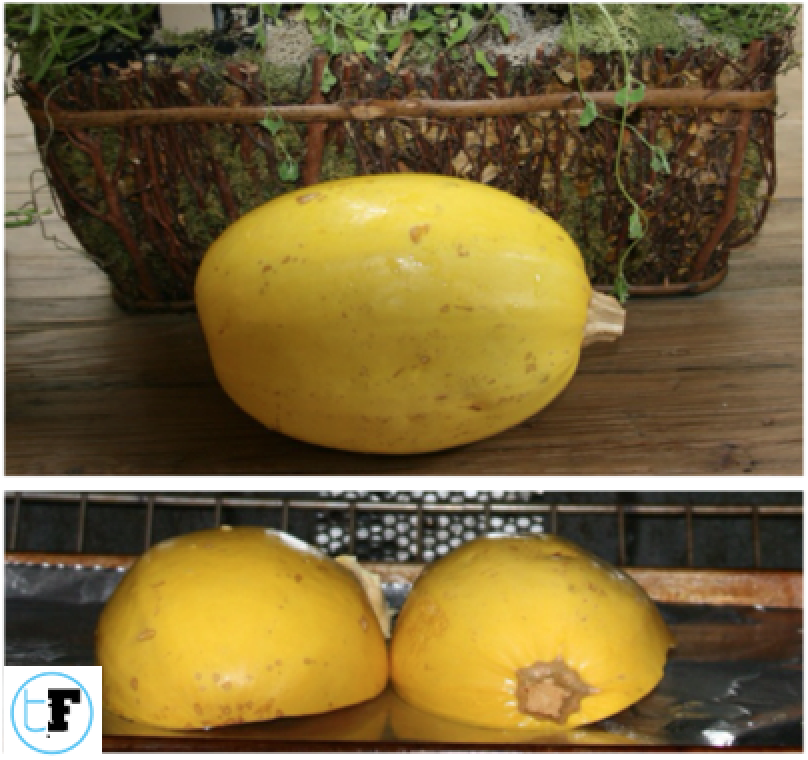
Screen Shot 2014-06-17 at 11.00.24 AM My family loves pasta! You can never go wrong with spaghetti and meatballs at the Ward house. However, as a healthy alternative, lately I have been experimenting with Spaghetti squash!  Spaghetti squash, a type of winter squash, gets its name from the pale-yellow flesh that can be fluffed into stringy, pasta-like threads. It has a very mild flavor and, unlike other winter squash, does not have much sweetness. So you can use spaghetti squash in both savory and sweet dishes!

Nutritional Information: (All values are per cup)
  • 42 calories per cup, according to the USDA National Nutrient Database
  • Very low in fat, with less than 0.6 grams of fat per cup 
  • 28 mg of sodium
  • 10 grams of total carbohydrates per cup (4 grams come from natural sugar in the squash, and 2 grams come from dietary fiber)
  • 1 gram of protein
  • All essential vitamins are found in trace amounts in the flesh of spaghetti squash
  • Vitamin C and vitamin B-6 are the vitamins found in highest concentration in the squash
  • Contains the minerals potassium (109 mg), calcium, phosphorus, magnesium and sodium
  • Contains omega-3 essential fatty acids and omega-6 fatty acids
Healthy Body Benefits:
  • Good choice for weight-loss or weight-management plans because it will fill you up without adding a lot of calories or fat to your daily total.
  • Helps regulate digestion, reduce constipation, and lower your cholesterol.
  • Improves growth and repair of body proteins, aids in wound healing and supports your immune system.
  • Aids in building muscle, metabolizing carbohydrates and maintaining proper muscle function in your body.
  • Potassium in the squash makes it the ideal diet for people with high blood pressure.
  • Functions as an electrolyte, helping to regulate fluid balance and the acidity, or pH, of your blood, which is essential any time you sweat heavily or lose body fluids.

There are so many different, delicious recipes you can make with spaghetti squash! Here are a few of our favorites! Hope you enjoy!


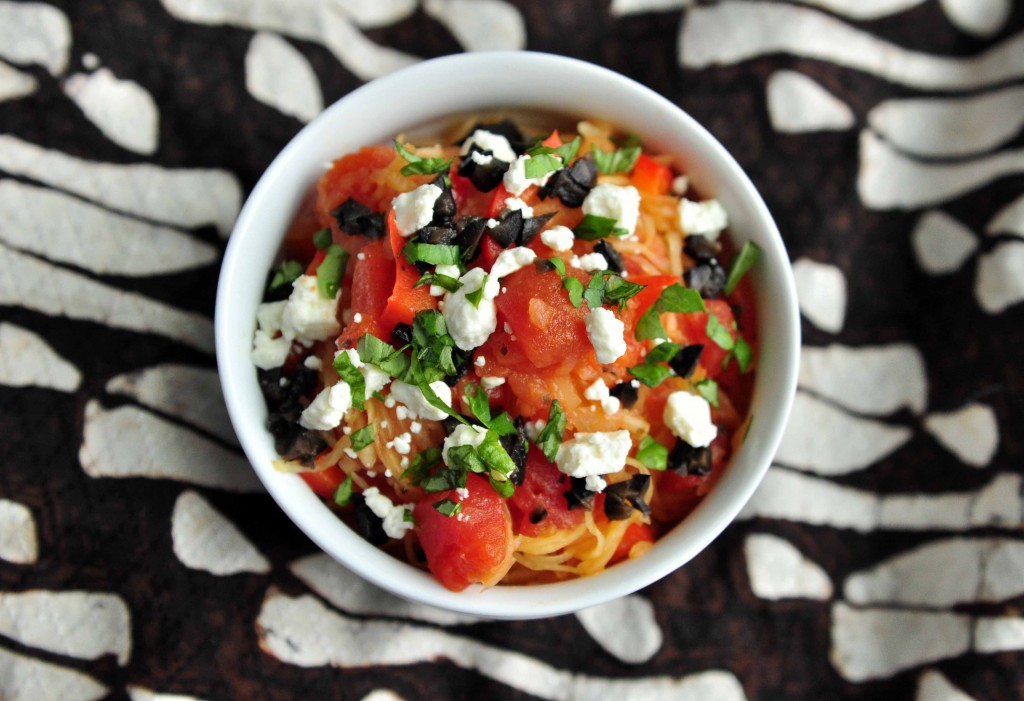
Spaghetti Squash with Feta, Olives, and Basil

Photo

Ingredients:

  • Spaghetti Squash, halved length wise and seeded
  • 1 tablespoon olive oil
  • 1 onion, chopped
  • 1 garlic clove, minced
  • 1 red pepper, chopped
  • 1 can Italian style tomatoes, 14.5 oz
  • ¼ cup feta cheese
  • 1 can chopped black olives
  • 2 tablespoons fresh basil, chopped

Directions:

  1. Pre-heat oven to 350 degrees. Lightly grease baking sheet
  2. Place spaghetti squash cut sides down on baking sheet and heat for 30 minutes or until a sharp knife can be inserted with little to no resistance. Remove squash from oven and set aside for 10 minutes
  3. While spaghetti squash is baking, heat oil in a medium skillet over med-high heat. Sauté onion until tender. Add red pepper and cook for three minutes more. Add garlic and cook for two minutes more. Add tomatoes and cook until warm.
  4. Use a large spoon or fork to scoop the stringy pulp from the squash and place into a large bowl. Add tomatoes mixture. Add olives. Toss until well mixed. Garnish with feta cheese and basil
  5. Add grilled chicken on top if desired!

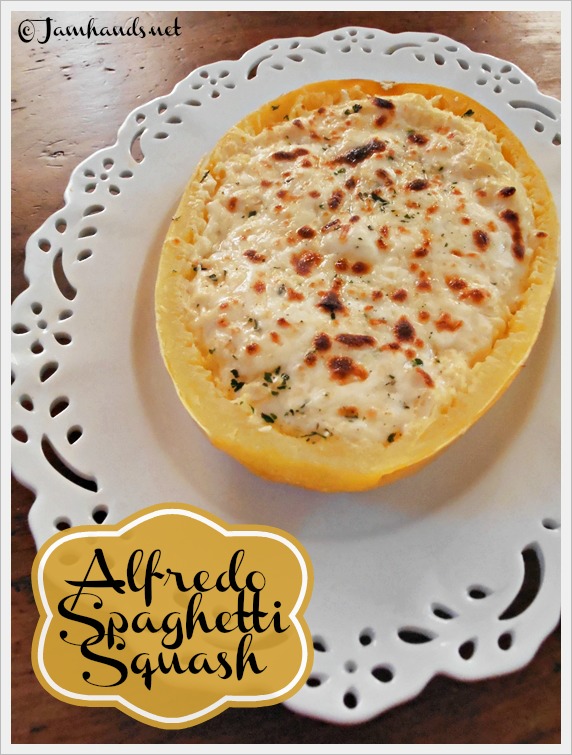
Spaghetti Squash Alfredo

Photo by www.jamhands.net

Ingredients:

  • 1 medium-sized spaghetti squash
  • 1 tbsp. butter
  • 3 cloves of garlic, finely minced
  • 2 tbsp. flour
  • 1 1/2 c milk (I used unsweetened almond milk)
  • 1 tbsp. 1/3 less fat cream cheese
  • 1 c freshly grated Parmesan cheese, plus 2 tbsp extra for topping
  • 1/4 tsp. salt
  • 1/8 tsp. pepper
  • Crushed red pepper flakes and fresh parsley, for optional garnish

Directions:

  1. Preheat oven to 375 degrees. Line a baking dish with foil and stab spaghetti squash all over with a fork. Place in dish and bake for 1 hour. Let cool 10-20 min. Using a large knife, cut spaghetti squash in half and let cool. After it cools a little, spoon out the seeds and strands in the middle.
  2. For the sauce, melt butter in a small pot over medium-low heat. Once hot, add garlic and sauté for 1-2 minutes. Whisk in flour, cooking for another minute while stirring. Whisk in milk until no lumps remain. Once hot, add cream cheese and stir until smooth. Remove from the heat. Stir in Parmesan, salt and pepper.
  3. Spoon sauce equally into each spaghetti squash half. Gently pull up the spaghetti strands to coat as much as possible with the sauce. Top with extra Parmesan and place under the broiler of your oven for 2-3 minutes, or until golden and bubbly. Top each half with a pinch of red pepper flakes and fresh chopped parsley, if desired. Serve hot.

Southwestern Stuffed Spaghetti Squash

Photo by www.thecomfortofcooking.com

Ingredients:

  • 1 spaghetti squash
  • 2 Tbs. extra-virgin olive oil
  • 1/2 red onion, chopped
  • 3 garlic cloves, minced
  • 1 jalapeno pepper, minced (leave seeds in for more heat)
  • 1 red bell pepper, chopped
  • 1 Tbs. ground cumin
  • 1 Tbs. Mexican oregano
  • 1 Tbs. chili powder
  • 1 can black beans (drained and rinsed)
  • 1 cup frozen corn, thawed
  • coarse salt and freshly ground pepper
  • 1/2 cup freshly torn cilantro, plus more for garnish
  • 1 lime
  • 1 cup grated reduced fat cheddar cheese

Directions:

  1. Roast squash on a baking sheet for 50 minutes. Let cool another 30 minutes, then cut in half. Spoon out the seeds, then using a fork, scrape up the flesh.
  2. Heat oil in a medium skillet. Add the onion, garlic, jalapeno pepper and red bell pepper. Saute 2 minutes. Add cumin, Mexican oregano, chili powder and a good pinch of salt and pepper. Saute another minute. Add the beans, corn and cilantro. Stir to combine. Squeeze in the lime juice and give one last stir.
  3. Add in half the “spaghetti” to the bean mixture and stir to combine. Taste and season accordingly. I probably tossed in a little more salt at this point.
  4. Switch oven to broil.
  5. Stuff each squash half with the mixture and top with grated cheese.

Let me know which one is your favorite spaghetti squash recipe!

Blessings, Caroline

Cinnamon Vanilla Nice Cream - a delicious dairy-free treat

img_8818.jpeg
IMG_8818

 
My sister in-law and 17-year-old niece were in town this weekend for some girl time before she graduated high school! We had the best time walking around downtown Athens, eating at a local restaurants, watching a movie, and relaxing on our screen porch. Thankfully she enjoys healthy foods and exercising and she told me about her favorite little treat - banana ice cream! I was SO excited to try to create a new treat that our whole family would enjoy, so we played in the kitchen Saturday night creating a yummy new treat!
 

Cinnamon Vanilla Banana NIce Cream (dairy-free)

Screen Shot 2014-06-10 at 11.04.58 AM

I keep frozen  peeled ripe bananas in my freezer at all times. You never have to throw away ripe bananas. Just peel and place in a zip-lock for later use.
 
Servings: Makes 2
Prep Time: 5 minutes
Ingredients:
  • 3 Bananas (frozen)
  • 2 Dates (pitted)
  • 1 Tsp. Pure Vanilla Extract
  • 3 TBSP. Almond Milk (added in parts)
  • 1 Cup Crushed Ice
  • 1 TBSP. Almond Butter or Peanut Butter 
 
Have fun with this, you could also add in some chocolate chips, coconut flakes, or strawberries. If you have a strong sweet tooth you may want to add some agave nectar to taste!
 
Directions:
  1. In a vita-mix or other high-speed blender add all the ingredients
  2. I like to add the almond milk in parts so if you like your ice cream thick you can adjust the liquid
  3. Serve immediately for a soft serve dessert or freeze for nice cream later! 

Hope you enjoy! 


Dark Chocolate Raspberry Smoothie

screen-shot-2014-05-30-at-11-34-56-am.png

Screen Shot 2014-05-30 at 11.35.39 AM

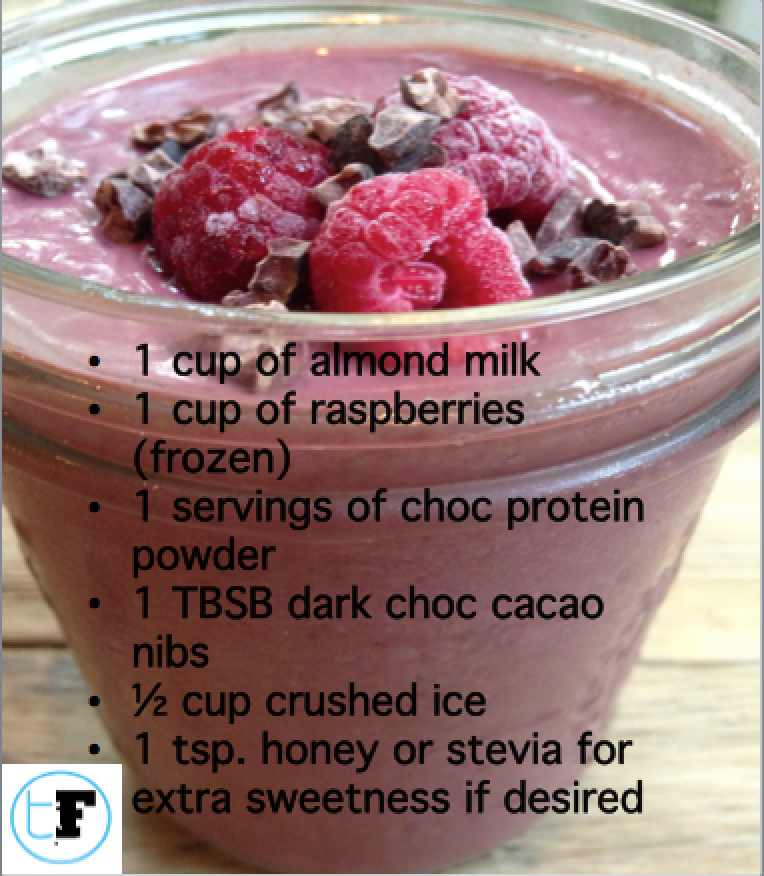
 Who says you can't have chocolate for breakfast? This delicious  & super healthy dark chocolate raspberry smoothie is so easy to make and one of our family favorites! Try making it for a wonderful breakfast or lunch treat, even the kids will enjoy! 
 

Screen Shot 2014-05-30 at 11.34.56 AM

Dark Chocolate Raspberry Smoothie

Ingredients 1 cup Almond Milk (I like Silk Unsweetened Vanilla)

1 cup frozen raspberries

1 Serving Chocolate Protein Powder

1 TBSP Dark Chocolate Cacao Nibs (or 1 tsp chocolate unsweetened cocoa)

1 tbsp. honey or 2 drops Stevia

1/2 Cup Crushed Ice

(you can add 1 frozen banana and/or spinach for extra nutrients)!

Directions

Step 1 – Place all ingredients in a blender, and blend till smooth.

Step 2 – Pour it into a pretty glass, find a relaxing place to sit, and sip it slowly for the “full smoothie experience”.

Enjoy your healthy day!!! 

Blessings, Caroline

School's Out for Summer!

picstitch.jpg

With school coming to an end, summer is about it begin! Being a mother to three amazing (very spirited) kids, I know how difficult it can be to prepare, in advance, healthy meals and snacks!  I have found that involving the children in grocery shopping, prepping, and baking helps them to learn and to enjoy eating healthy! Try letting them choose dinner one night (setting some parameters) and let them participate and help with the cooking! Getting the kids involved in the preparation of meal time is a great way to involve the whole family, while still eating healthy! I love to plan fun activities that my family will enjoy especially during the summer! My kids LOVE popsicles but it is difficult to find ones that have less than 20 hard-to-read  ingredients, so we have come up with a wonderful alternative! Turn making delicious homemade popsicles into a fun activity and craft that the kids can be apart of! There are numerous healthy recipes to choose from! Let your child choose which fruit he or she wants to make into a treat!  Enjoy! 

                                  SUMMER STRAWBERRY POPSICLE! 

  • 2 cups of  FROZEN strawberries (red and juicy are the best)
  • 1 cup of coconut milk
  • 1 tablespoon of honey
  • You can substitute any fruit you would like!

320

Directions:
  1. Place all ingredients in a food processor or blender and process or blend until pureed
  2. Set up your popsicle holders. Pour the liquid in the popsicle containers.
  3. Place in freezer for 4-6 hours. Serve and Enjoy!

picstitch

Watermelon Popsicle Recipe:

Image from TheThriftyMama.com

  • Juice from half of a watermelon
  • Juice from one whole lemon
  • Pinch of salt
  • Honey to taste (optional)
Popsicle molds can be ordered online or bought at a local Bed Bath and Beyond, Target, Walmart, Publix, Amazon, etc.!

http://www.bedbathandbeyond.com/1/1/173892-zoku-classic-pops-mold.html

http://www.amazon.com/Mastrad-A47221-Molds-White-Base/dp/B001RCTMTU/ref=sr_1_15?ie=UTF8&qid=1400616043&sr=8-15&keywords=popsicle+molds

"Start children off on the way they should go, and even when they are old they will not turn from it."
Proverbs 22:6

Gardening is Exercise!

strawberrymangosalsa-3.jpg

Since the month of May is all about understanding that “Exercise is Medicine,” what better way to spend your day than outside in the fresh air with friends and family gardening!? Yes you heard right, gardening is a great physical activity that you can enjoy and benefit from in numerous ways! Use hoeing and raking to strengthen your upper body and core. Use the quadriceps and hamstrings in a proper squat when bending down to plant flowers. Don't forget to try some light stretches for your hamstrings and lower back . Another helpful tip is to take a few breaks throughout the day to drink some extra water and do some additional stretching! This month think of fun outdoor activities that you can participate in while at the same time completing your exercise for the day!

Photo by She Knows Living

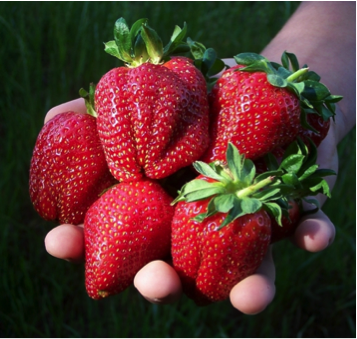
Another fun activity to organize with friends and family this month is spending an afternoon strawberry picking at our local Washington Farms in Athens-Watkinsville, GA.

Photo by Washington Farms

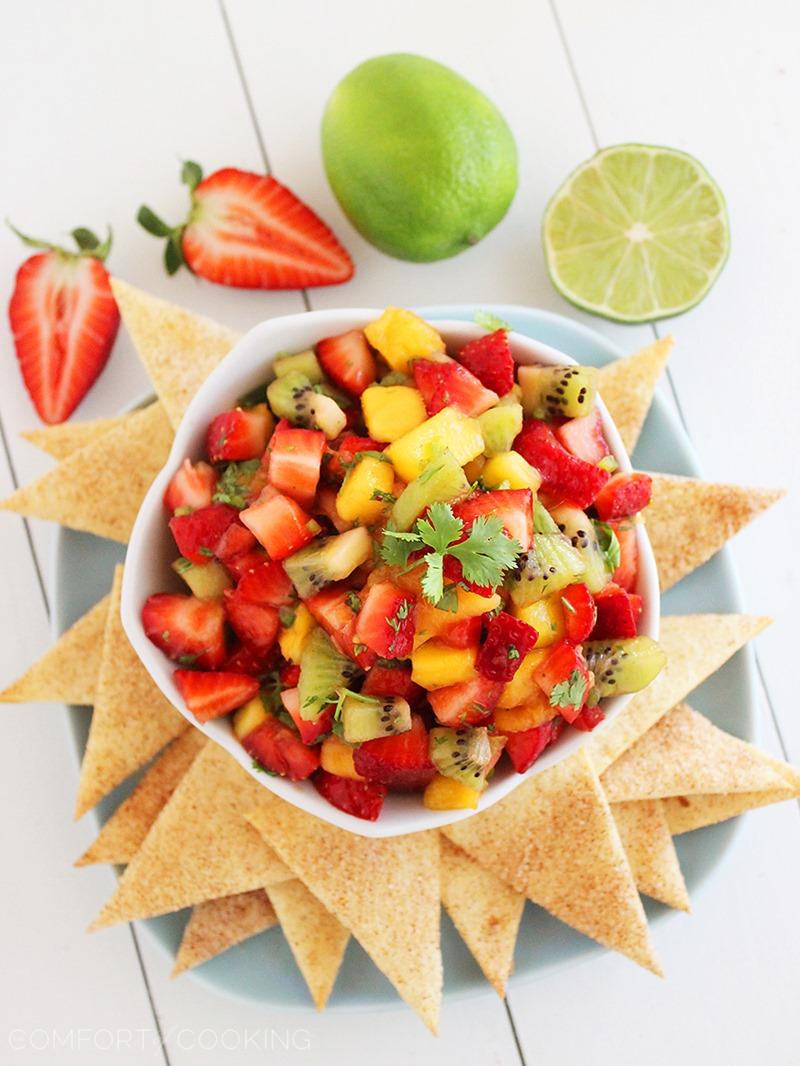
After picking some delicious strawberries, try this amazing dip recipe!     STRAWBERRY MANGO SALSA 

Photo by The Comfort of Cooking

Vegetarian and Gluten Free
Prep Time – 10 minutes
INGREDIENTS
  • 1 cup diced strawberries
  • 1 cup diced mango
  • 1 cup diced avocado
  • 1 small jalapeno, seeded and minced
  • 2 tablespoons diced red onion
  • 2 tablespoons chopped fresh cilantro leaves
  • 2 teaspoons honey, or more to taste
  • Juice of 1 lime or 2 Tbsp lime juice

Mix all ingredients in bowl and enjoy with homemade pita chips or on top of a spinach salad!


Photo by HGTV

Not only is gardening fruits and vegetables fun, but you can also enjoy the convenience of fresh herbs at home. Many love the accessibility of fresh herbs in the kitchen while cooking meals. Follow these easy, manageable steps to produce your own herbs in your very own kitchen:

  1. Find the best spot with as much natural light as possible
  2. Give indoor herbs good drainage
  3. Use typical indoor temperatures (65 to 75 degrees F)

Try any and all of these culinary herbs: Chives, Lemon Balm, Marjoram, Mint, Oregano, Rosemary, Sage, and Thyme

One of my favorite cookbooks, Southern My Way Food & Family, uses wonderful herbs in many of the delicious recipes.

Blessings, Caroline
"And the seed whose fruit is righteousness is sown in peace by those who make peace."
James 3:18


Coconut Cashew Energy Ball! Extra Fiber for your day!

coconut-cashew-energy-ball.png

  Photo by OneResult

Fiber is such an important part to a healthy diet! I wanted to share a few facts and my new favorite energy ball!

Fiber is a type of carbohydrate the body cannot digest, that helps regulate the body’s use of sugars. Food high in fiber can make you feel fuller longer, and are associated with lowering the risk of certain diseases such as heart disease, type 2 diabetes, and some types of cancer. There are two types of fiber: soluble and insoluble.

Soluble fiber, which dissolves in water, lowers cholesterol and keeps blood sugar levels steady. Good sources of soluble fiber include oatmeal, nuts, beans, apples, and blueberries.

Insoluble fiber, which does not dissolve in water, maintains the digestive system and helps with regularity. Good sources of insoluble fiber include whole wheat products, whole grain couscous, brown rice, leafy green vegetables, sweet potatoes, and carrots. 

U.S. Institute of Medicine recommends 25 grams of fiber each day for women under the age of 50, and 21 grams of fiber each day for women over 50. If you want to get more specific, you can calculate the amount of fiber you need based on how much you eat. According to the Centers for Disease Control and Prevention, you should consume about 14 grams of fiber for every 1,000 calories you consume. 

Most Americans, however, only get about 15 grams of fiber each day. So how do we alter our diets to get more? An easy switch to make is avoiding refined grains like white flour, white pasta, and white rice, and instead replace them with 100% whole grains. Another way to increase the fiber in your diet is choosing snacks with fiber to help maintain blood sugar levels throughout the day and to help curb overeating. 

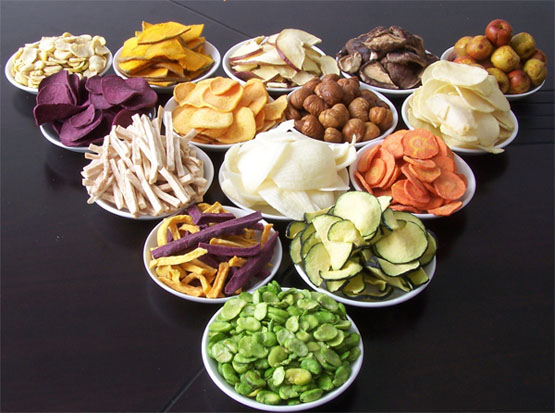
Photo by Barn Dad Nutrition

Some of my favorite fiber rich snacks:

  • carrots with hummus- both carrots and chickpeas are excellent sources of fiber
  • an apple or a pear
  • air popped popcorn (without butter)
  • nuts, raisins, and dates
  • chia seeds

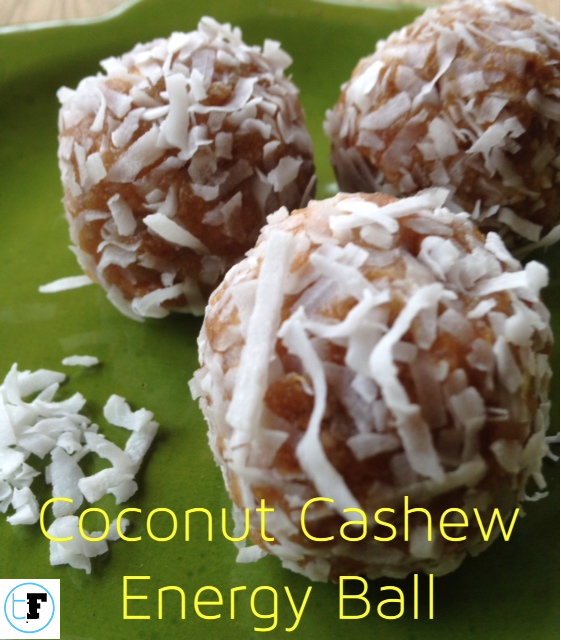
Dates are a great source of fiber, containing 12g per cup! That's almost half the daily fiber necessary for women, yet dates have a stigma they can't seem to shake. My recipe for Coconut Cashew Energy Balls calls for dates, yet the result is a moist, chewy, delicious treat!  Can't wait for you to give this high-fiber snack a try!

coconut cashew energy ball

Coconut Cashew Energy Balls! (Gluten Free)

Yield: 12

Ingredients:

  • 1 Cup Pitted Dried Dates (9-10 dates)
  • 1 Cup Cashews
  • ½ Cup unsweetened Coconut flakes
  • 1 tsp Cinnamon
  • 1 tsp Pure Vanilla Extract
  • 1 Tbsp. Coconut Oil

Instructions:

Soak the Dates in water for 10 minutes to soften. Place all ingredients into food processor or blender and process for approximately 2 minutes until everything is ground. Roll into Balls.  Spread coconut flakes on plate and roll ball on flakes to cover!  Makes approximately 15 tablespoon sized balls. Store in the refrigerator. Perfect easy to make treat for the entire family! Yum!

Enjoy and have a wonderful day! Caroline


Chia Pudding- Nutritional Powerhouse!

chia-in-mason-jar.jpg

Photo by Seed Guide

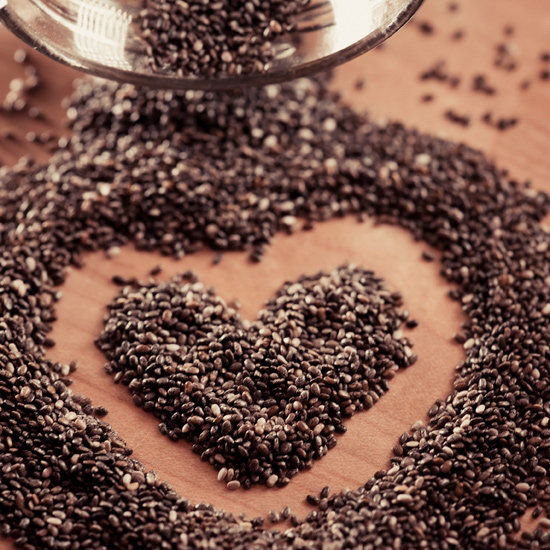
Chia is an amazing superfood that can add tons of fiber and other important nutrients to your diet. One serving alone contains 14 grams of fiber, or 56% of your recommended daily intake! Other benefits of Chia include boosting energy, stabilizing blood sugar, aiding digestion, and lowering cholesterol. Wow! 

Chia can be added to your diet in several different ways. The first is by sprinkling it onto other foods, such as yogurt, cereal, smoothies, or even mixing it into pasta sauce once the sauce has been cooked. Even my kids will eat Chia seed this way because they can't taste the difference in the foods. Incorporating Chia seed great way for kids to get the essential calcium, iron, omega-3s, and folic acid they need while they are growing.

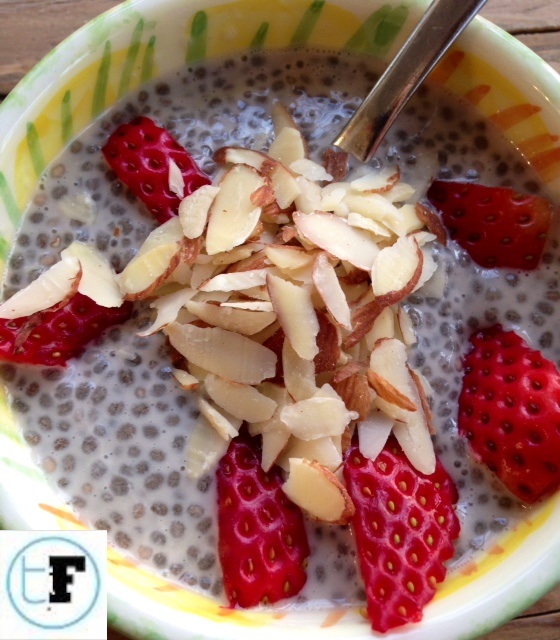
Alternatively, you can make it into food on its own like I've done in the following Chia Pudding Recipe. I enjoy eating it for breakfast since I love to kick off my day with some extra nutrients, and it leaves me feeling full all morning.

chia_pudding

Chia Pudding

1 serving

  • 1 cups plain almond milk or coconut milk
  •  3 TBSP chia seeds
  •  3-4 drops stevia extra or 1 TBSP pure maple syrup
  •  1/2 tsp. cinnamon
  •  1/2 tsp. pure vanilla extract
  •  Pinch salt

Instructions:

 1. Place the chia seeds in a medium bowl or mason jar. Add the almond milk, vanilla, stevia or maple syrup and a pinch of kosher salt. Whisk or shake to combine.

2. Cover the bowl tightly with plastic wrap or mason jar and refrigerate for at least 4 hours, stirring/shaking occasionally. I recommend letting the pudding rest in the refrigerate overnight, but 4 hours will do if you’re feeling antsy.

3. Before serving, stir the pudding to make sure that there are not any clumps. Spoon pudding into bowls or glasses and garnish with toppings of your choice. My favorite topping is walnuts and frozen blueberries!

Suggested Toppings:

(These are combinations that I have tried, but feel free to mix and match and get creative!)

  • Mixed berries and sliced almonds
  • Diced mango, toasted coconut, and dark chocolate shavings
  • Sliced Bananas with cinnamon
  • Blueberries, toasted walnuts
  •  Granola

Photo by The Yummy Life

As always I love getting feedback from all of my friends, so let me know your favorite toppings or if you have any great Chia recipes!

Blessings,

Caroline

Chocolate Chip Cookie Bars (Flour-less): Yum!

You may have noticed a lot of food related posts on the blog lately. There are two reasons for that. One- I've been hearing about some great new foods lately and I love finding good recipes for them to make it easy for everyone to incorporate them into their diets. Two- starting my online training program has really gotten me thinking about my friends' dietary needs.

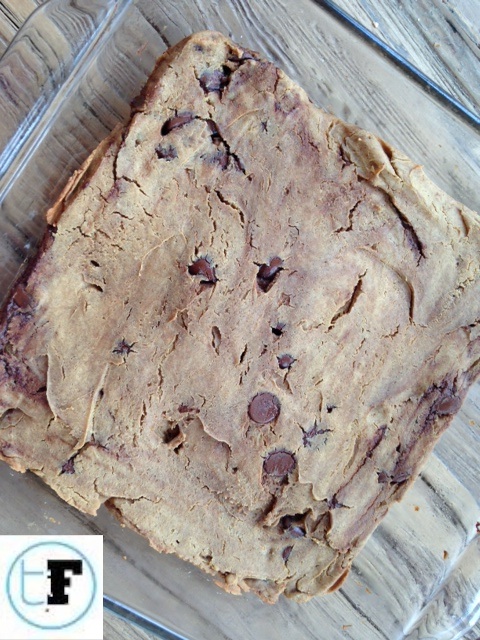
One need I've been seeing a lot of is the need for gluten-free foods, and a desire for nutritious and delicious desserts. The recipe for flour-less chocolate chip cookie bars accomplishes just that, and are super easy to make. The recipe calls for chickpeas instead of flour, which add protein and fiber without sacrificing any flavor. What's even better is that the cookie bars can be vegan too, simply by substituting the dark chocolate chips for vegan chocolate chips. Yum!

blondies 2

Chocolate Chip Cookie Bars (Flour-less)

Ingredients:

  • Coconut Oil Cooking Spray
  • 1 can (15 oz) chickpeas, rinsed and drained
  • 1/2 cup all natural peanut butter  or almond butter
  • 1/3 cup pure maple syrup
  • 2 teaspoons pure vanilla extract
  • 1 teaspoon cinnamon
  • 1/2 tsp salt
  • 1/2 teaspoon baking powder
  • 1/4 teaspoon baking soda
  • 1/2 cup dark chocolate chips

photo (8)

Instructions:

  1. Preheat oven to 350 degrees  and spray 8×8 inch pan with cooking spray.
  2. In a food processor or blender, add all ingredients except chocolate chips and process/blend  until batter is smooth. Fold in ¼ cup  of the  chocolate chips.
  3. Spread batter evenly in prepared pan then sprinkle ¼ cup of chocolate chips on top. Bake for 20  minutes and edges are a tiny bit brown.
  4. Cool pan for 20 minutes on wire rack. Sprinkle with sea salt then cut into squares.  Enjoy immediately!

Makes 16 Cookie bars.

blondies

As you can probably imagine they were a hit with my children! I will definitely be making these again soon!

photo (7)

Blessings,

Caroline

Apple Cider Vinegar- drink to your health!

Photo By Jill Nystul

Apple cider vinegar benefits are plentiful! Experts say the drink  can cures hiccups to alleviating cold symptoms, and some people have turned to apple cider vinegar to help fight diabetes, cancer, heart problems, high cholesterol, and weight issues. Read below for more reasons to keep apple cider vinegar handy in your kitchen.  Try a 30 day challenge with me and see how you feel! Take 1 Tablespoon of apple cider vinegar before breakfast daily! Enjoy your healthy day!

28 HEALTH AND BEAUTY BENEFITS OF APPLE CIDER VINEGAR

14 HEALTH BENEFITS OF APPLE CIDER VINEGAR:

  1. Tame tummy troubles
  2.  Prevent indigestion
  3. Help clear a stuffy nose
  4. Help for hiccups
  5. Soothe a sore throat
  6. Reduce swelling
  7. Extinguish exhaustion
  8. Relieve nighttime leg cramps
  9. Banish bad breath
  10. Fight yeast infections
  11. Get rid of foot or skin fungus
  12. Control blood sugars
  13. Boost weight loss
  14. Lower blood cholesterol

Photo By Carrie Jones

14 BEAUTY BENEFITS OF APPLE CIDER VINEGAR:

  1. Hair rinse
  2. Facial mask
  3. Skin toner
  4. Soothing bath soak
  5. Teeth whitener
  6. Invigorating foot soak
  7. Sunburn remedy
  8. Alleviate age spots
  9. Ease varicose veins
  10. Natural deodorant
  11. Acne remedy
  12. Wart removal
  13. Relieve arthritis pain
  14. Improve bone health

(Source: http://www.onegoodthingbyjillee.com/2013/09/28-health-and-beauty-benefits-of-apple-cider-vinegar.html)

Try a Shamrock Shake!!!

photo-24.jpg
IMG_2130
IMG_2130

St. Patrick's Day is coming up and my family is beyond excited! Anyone who knows me well knows I am sucker for any holiday!!! Growing up we created a special event out of any possible holiday from the Great Pumpkin to the Easter Chicken (bunnies don't lay eggs right?)-- there was always some sort of celebration!  Today my own kids see the green theme as a cool way to celebrate, while I try to create a fun way to incorporate more vegetables and protein into their diets. One of my favorite drinks that accomplishes this is my Shamrock Shake. It's a great way to get extra nutrients after a workout, for breakfast or delicious as a snack.

photo (2)
photo (2)

Shamrock Shake Serves 1

Ingredients: 1 cup Vanilla Silk Almond Milk 1 serving Vanilla protein powder 1 frozen banana 1 TBSP Ground Flax Seed 2 Cups Spinach 1 tsp Vanilla extract 1 Cup Crushed ice ** can add 1-2 drops Stevia liquid or 1 TBSP honey for added sweetness! --Blend, Serve & Enjoy

photo (3)
photo (3)

My daughter, Kaitlyn, had a great time helping me make one before school.

photo-24.jpg
photo (24)

Enjoy & have a wonderful weekend! 

Blessings, Caroline